|
||

|
|
Oil LeakageOil Leakage In GeneralMost Volkswagen owners think that oil leakage from their rides is just the nature of the beast. Its true that most VWs tend to leave a drop or two (and sometimes more) on the driveway (we like to say that our Bugs mark their territory), but this does not have to be the case. Our 1973 Super Beetle used to make quite a mess, but with a bit of effort, our driveway is now a lot cleaner. VWs don't HAVE to leak.
 Oil Leak!it can make a real mess of your driveway. But oil leakage does seem to be a chronic problem, especially with older VWs. As you begin your work to find and fix the leak(s), the first thing you must determine is -- does the leak occur all the time (i.e., by gravity), or does it occur only when the system is under pressure (i.e., when the engine is running)? Following is a list of the possible sources (probably not comprehensive) of both gravity and pressurized oil leaks, each of which will be addressed in this article. (Each of the items in this list is a link, so you can go directly to the topic you're interested in. Gravity Leaks may come from -
Pressure leaks may come from -
Gravity Leaks1. Sump Plate Leaks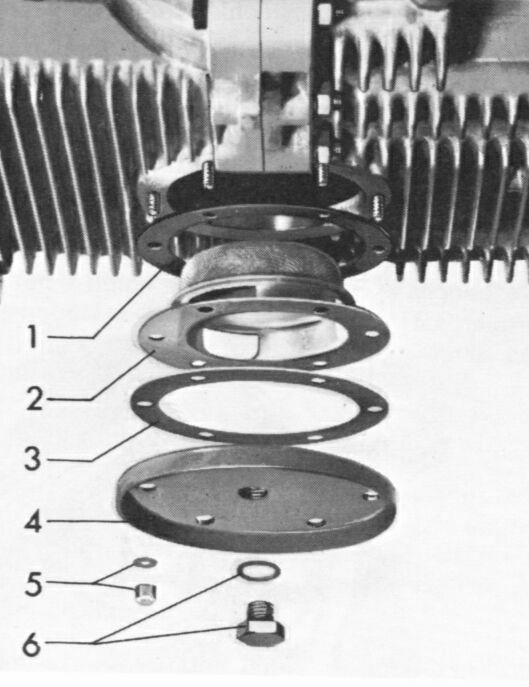 Oil Sump Platethe aluminum strainer are perfectly flat. The sump plate is held in place with six very small (6mm) studs and 10mm nuts. It may or may not have a drain plug (19mm) in the center. From about 1973 on VW dropped the drain plug from the sump plate, forcing the owner to remove the sump plate to drain the oil. As a result, the small studs get used a lot. If you have one of these sump plates, we would recommend that you replace it with an earlier one (theyre not expensive) so you can drain the oil without removing the sump plate. When reinstalling the sump plate after an oil change, make sure the sump plate isnt warped. And be careful not to tighten the 10mm nuts TOO tight, as it is fairly easy to strip the threads in the soft relatively soft metal of the engine case. A "snug-and-a-tug" with a 1/4 ratchet is all it takes. Always install a new brass collapsible washer under the drain plug every time you remove it. If you have the oil drain plug and use it for your routine oil changes, be sure to remove the sump plate every three to four oil changes and thoroughly clean the screen.
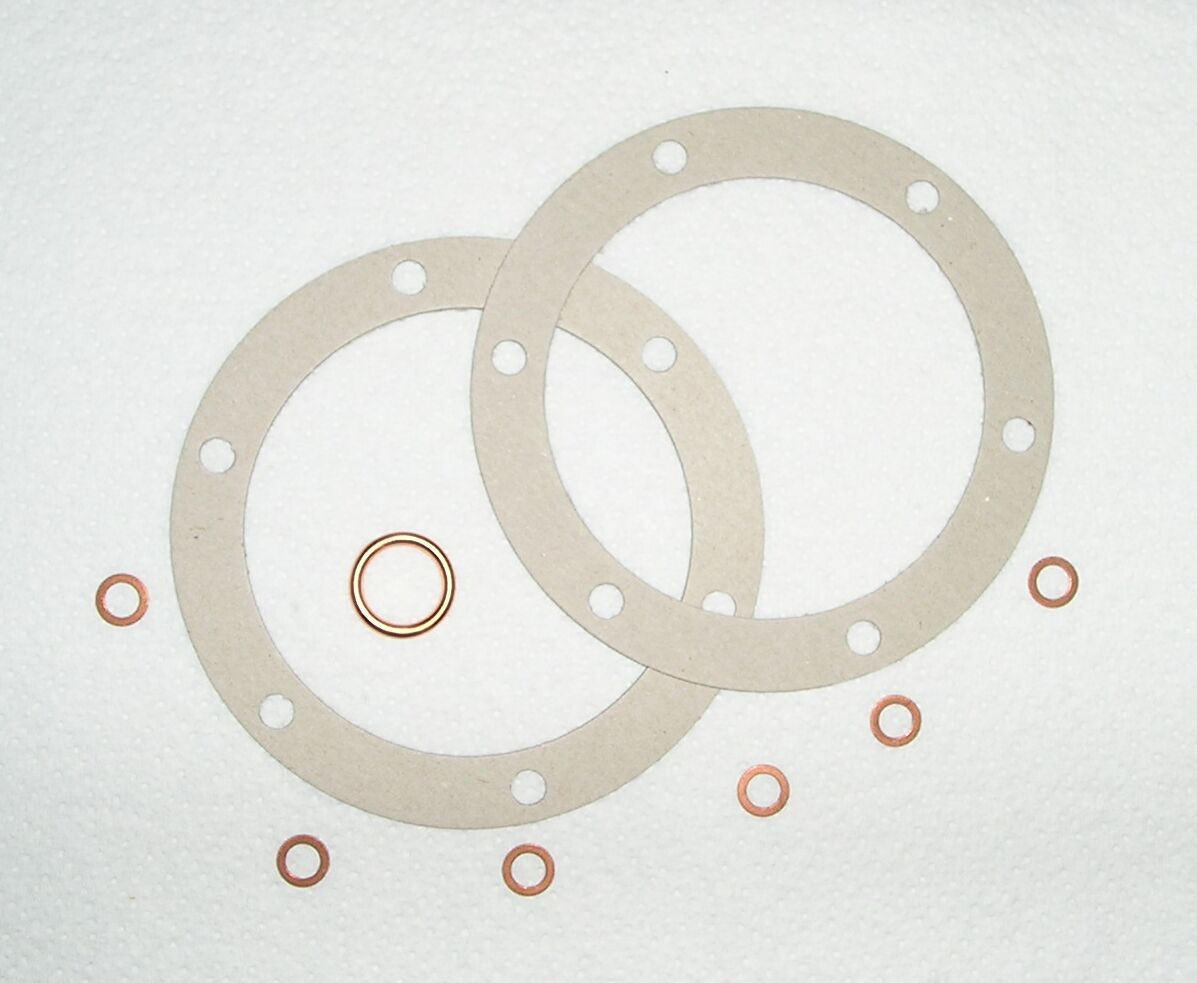 Oil Change Gaskets and WashersThe paper gaskets that are supplied with oil-change kits these days are VERY thin and so don't seal very well at all. We have had much better success (no leaks) by buying thicker gasket paper and cutting our own gaskets. Its tempting to use a sealant (e.g., RTV, Form-a-Gasket, etc.) on these thin paper gaskets, but we dont recommend this. In our experience the sealant doesnt help very much and makes a real mess for you at the next oil change. The gaskets should be installed dry. The aluminum oil strainer plate sometimes becomes a little distorted. This can be corrected by tapping it lightly with a hammer on a flat surface, just to remove any bent lips etc, before reinstalling it. We have found that the combination of thick dry paper seals and care in flattening any problem areas on the aluminum plate usually fixes any leakage problem with the sump plate. Now, concerning those six little (6mm) studs around the perimeter of the sump plate: as we said, it is easy to strip the threads in the engine case. You may find that some careless PO has over-tightened the nuts on these studs and has stripped the threads in the case. If you find this to be the case, dont despair. Stepped studs are available to fix this problem -- these have a larger threaded end and a smaller threaded end. This allows you to re-tap the case threads to 8mm while keeping the projecting part of the stud at 6mm so it still lines up with the holes in the sump plate. Most automotive shops carry stepped studs and the tapping tool needed to enlarge and tap the holes. Only five of the studs can be replaced this way -- one stud goes through into the sump and is used to hold the bottom of the oil pick-up in place -- this one won't strip the case of course, because it has more than the case material holding it in place. 2. Oil Pump LeaksThere are four bolts that pass through the oil pump housing, a gasket, and cover. Snugging up these bolts may help to reduce oil leakage, as they can work loose occasionally. Not TOO tight -- check the VW service manual for the torque. 3. Cracked Engine CaseA cracked engine case isnt very common -- an engine has to be badly abused over a long time for the case to crack. A crack in the engine case usually occurs around the base of cylinder #3 - the left front cylinder. It's hard to distinguish this kind of leak from an oil cooler leak, since the oil tends to wet the same areas. It's also hard to see these cracks from the outside. But - if the case is cracked, its toast. The case will have to be replaced, which involves removing the engine from the car, removing the engine internals, then reinstalling the internals in a new engine case. Good used engine cases are available - it pays to shop around. Pressure Leaks4. Leaking Valve Covers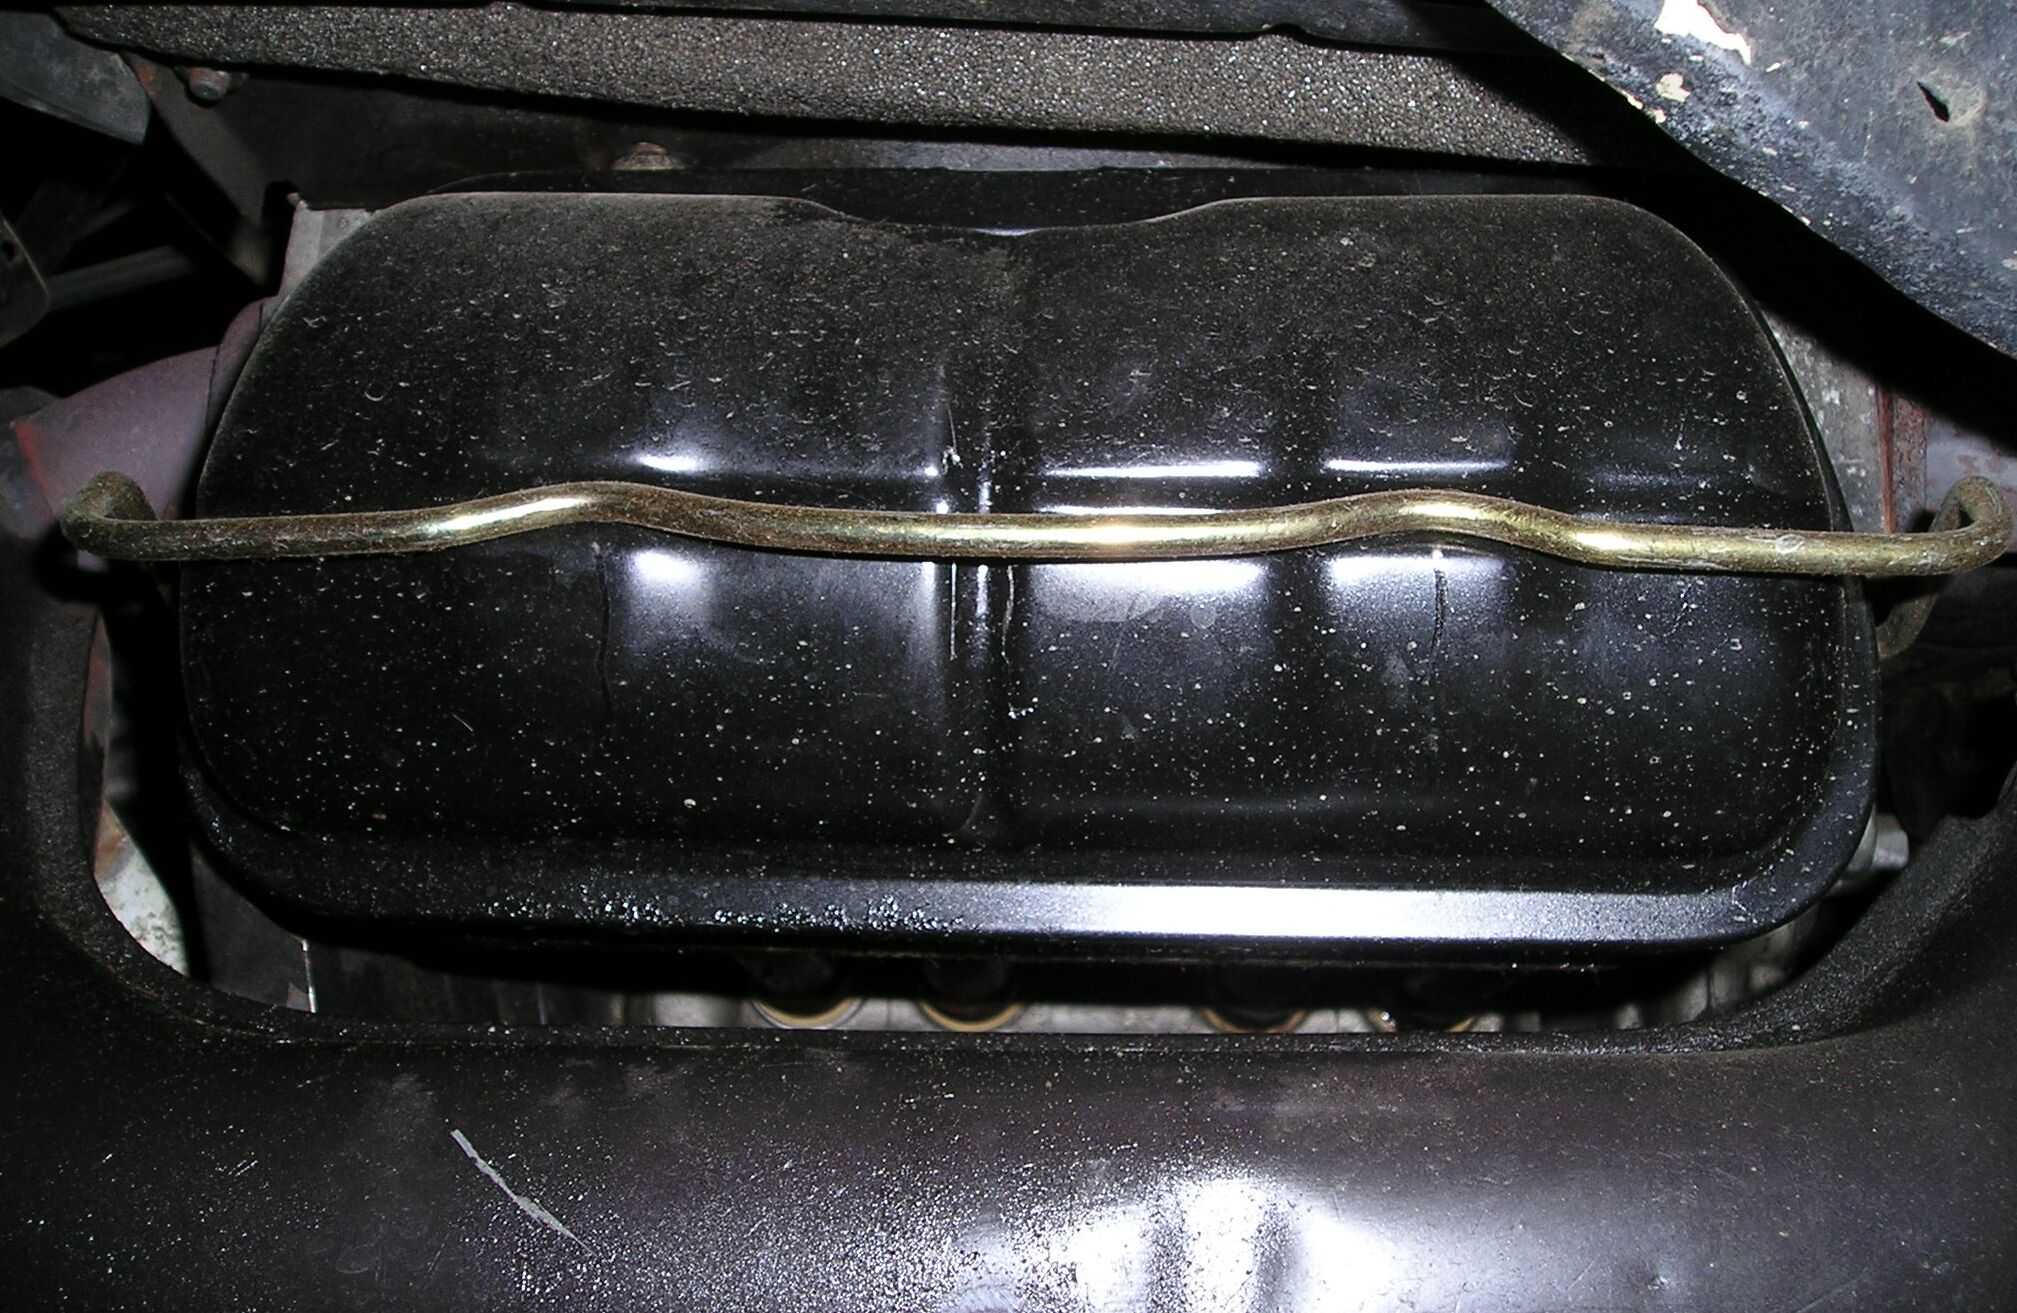 The Stock Black Valve Coverwith NO oil leakage down the side of the heater box. by John Connolly, Aircooled.Net.) Oil leaks from the valve covers are very, very common. Such leaks occur mainly because the covers and gaskets are not installed correctly or the covers have been warped or damaged. The lip on the heads may be damaged, but this is less likely. Aftermarket valve covers are notorious for leaking, especially the bolt-on variety. To have a leak-free valve cover, your very best bet is to use genuine VW valve covers -- either a known good used set, or a new set of new ones. Another cause of oil leaks from the valve covers could be worn valve cover bails. The valve cover bails should be fairly difficult to remove when unclipping them from the valve cover. They should hold very tight against the valve cover. Over time, the "spring" in the bails can get weak. You can spend some time putting the bail in a vise, and 'tweaking' it until it fits tight again. Regarding bolt-on valve covers: the stock valve cover bails keep the cover tight regardless of the expansion and contraction that takes place as the engine cycles from cold to hot and back to cold again. Bolt on covers are more prone to leakage because they loosen during this temperature cycling. If you do not have a set of valve covers and bails that you know are good, make the investment -- they are relatively inexpensive. Parenthetically, we recommend that you stick with the stock black valve covers to help keep the engine cool. Oil temperature has been found to run 20-30 degrees cooler with the black valve covers. The fit of the covers on the heads is quite forgiving -- the cover moves around a little so it's easy to ensure it's seated properly. Make sure that the gaskets are fitted snugly around the rim of the cover to prevent sagging of the gasket at the top. If the gaskets sag, leaking will be worse with the engine running (throwing oil all over the inside) than with it stopped.
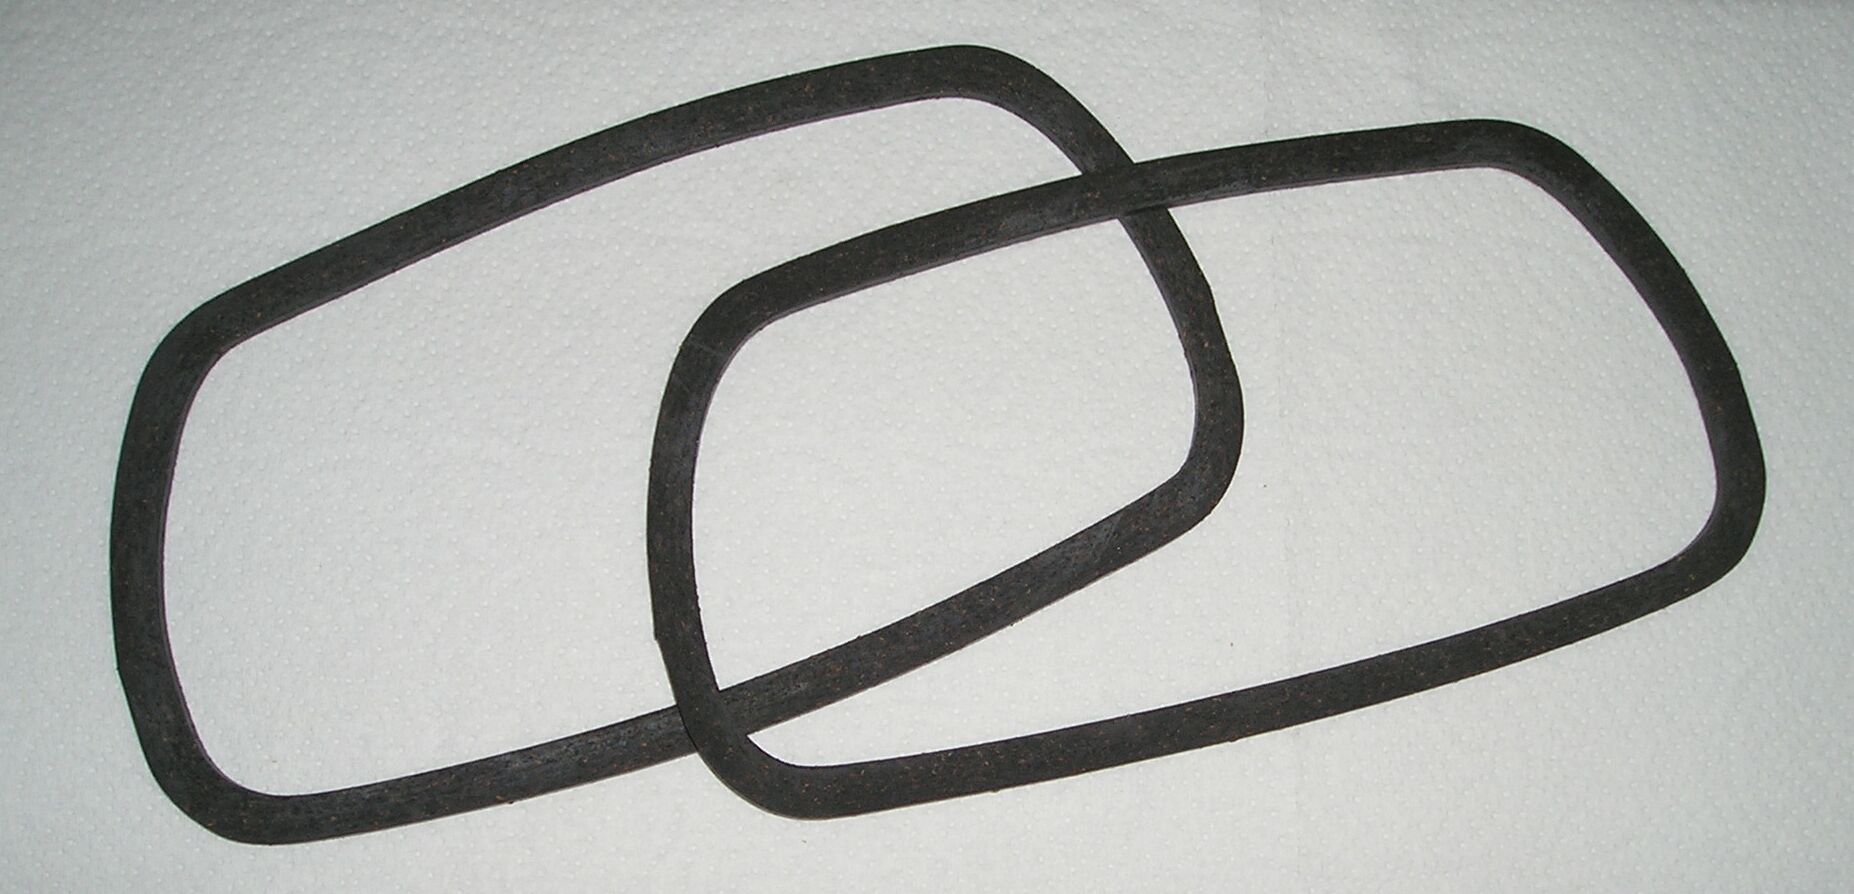 Valve Cover Gasketsevery time you adjust the valves. There are two basic types of valve cover gaskets available -- cork and rubber. The rubber gaskets are available at the more generic parts stores. We recommend the use of cork valve cover gaskets. When the rubber gaskets get oily they become slippery, which then can cause the gasket to get sucked into the head, causing a large oil leak. The valve cover gaskets and the covers are installed as follows: Start by removing the old gasket out of the valve cover and cleaning the sealing surface of the cover, where the gasket goes. Make this surface is SQUEAKY CLEAN! Put a thin coat of wheel bearing grease on the face of the gasket that fits to the head. Some people recommend applying a thin bead of high-temperature RTV to the sealing surface of the valve cover before installing the valve cover gasket. If you opt to do this, do NOT put RTV on the gasket surface that makes contact with the head! The RTV can be cured by attaching the valve cover to an old junk head for about six hours. This allows reuse of the valve cover gasket several times. We dont use any sealant at all on our valve covers, and they don't leak. When you reinstall the valve cover, wiggle it around to make sure it fits properly, then hold it with one hand and pry the wire bail up into the slot in the cover with the large screwdriver. It should take a little effort to slide the bail into the slot, as it should be very tight against the valve cover. If it feels TOO tight, check to make sure you haven't got the cover cocked at an angle -- slide it round a bit (or tap it lightly with a rubber hammer) to make sure it's seated properly -- flat on the head. 5. Leakage from the Push Rod Tubes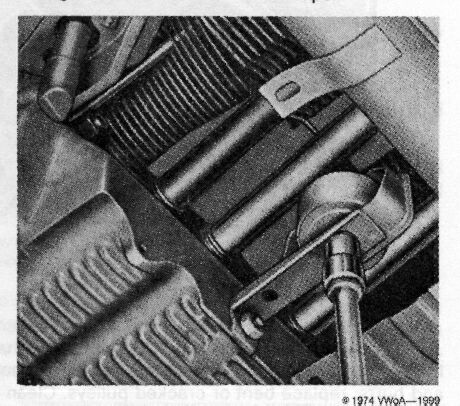 The Push Rod TubesIf your push rod tubes are banged up, you may be getting oil leakage there. The neoprene washers at the ends of the push rods gradually harden with age, and the concertina sections will lose a little of their "spring", resulting in leaks. Damage or bends in the tubes can make this worse. Also, the tubes can rust from the outside, resulting in pin-holes and oil leakage. To check for leaks from the pushrod tubes, get under the car after it has been on a run, and look very closely at the pushrod tubes themselves just under each cylinder. Be careful -- don't burn your nose on the hot exhaust/engine when doing this! Any leakage of oil should be obvious. If the push rod tubes look freshly wetted with oil, or if there is a mess of oily deposits on the cooling tinware under the pushrods, this may be part of your oil leakage problem. If your push rod tubes are leaking or damaged, there are replacement tubes which can be fitted without removing the engine. If you are doing engine work and have to install new cylinders/pistons anyway, the original equipment type of tubes can be used. The old tubes will be fine if they are not damaged/rusted (they must be straight), but you MUST replace all the neoprene washers (two for each tube). The "old boys" trick is to gently stretch the tubes a little (measure the length of each tube, then pull outwards gently on the concertina sections till it's a few mm longer) before reinstalling. This provides renewed "spring" to the tubes and ensures a good seal on the new washers. See our procedure for replacing the push rod tubes. 6. Oil Cooler Seals
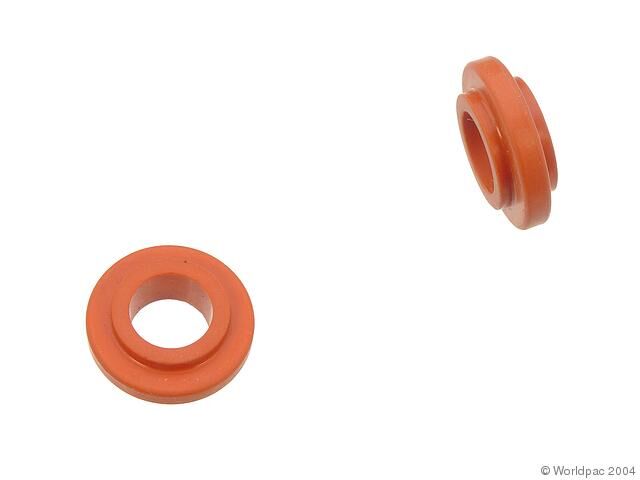
Oil Cooler and Sealsof seals. Make sure you get the right ones for your car. The other possible source of oil leakage is the oil cooler seals. Leaks there can dribble down to the left front of the engine, as the oil cooler stands off to the front of the engine, inside the fan shroud on the left side. If the oil cooler seals, fail you will see oil all over the underside of the engine where the cooling air has thrown it -- either the left-hand side of the bell housing under the doghouse air outlet, or around the left cylinders and cylinder air outlet. You may also see oil inside the engine bay, with oily wetness appearing on top of the case and tinware, mostly on the left side. In extreme cases the oil may get into the fan, which will fling it all over the engine compartment (voice of experience!). You should be able to see any leaks under the cooler if you life the fan shroud up away from the engine tinware. Older oil cooler models had two seals for the inlet/outlet; later models have four seals. The seals are cheap -- its a good idea to replace them whenever you have the engine out of the car. Replacement of the seals is easy if the engine is out of the car; the job can be done with the engine in the car, but its difficult, requiring removal of the fan shroud and all that that entails. See our fan housing removal procedure. 7. Oil Leakage from the Axle Boots
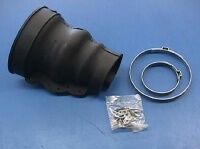
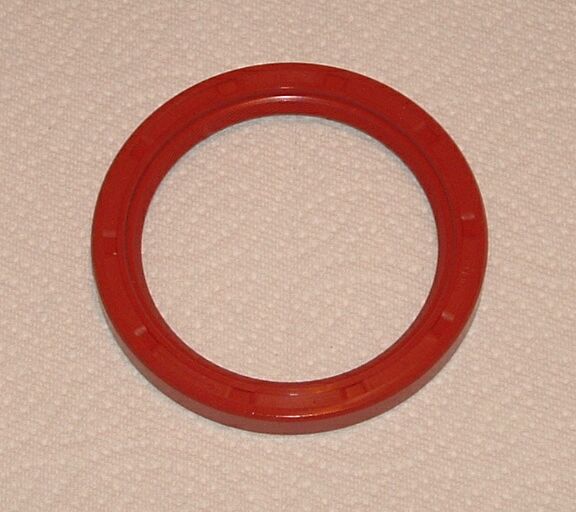
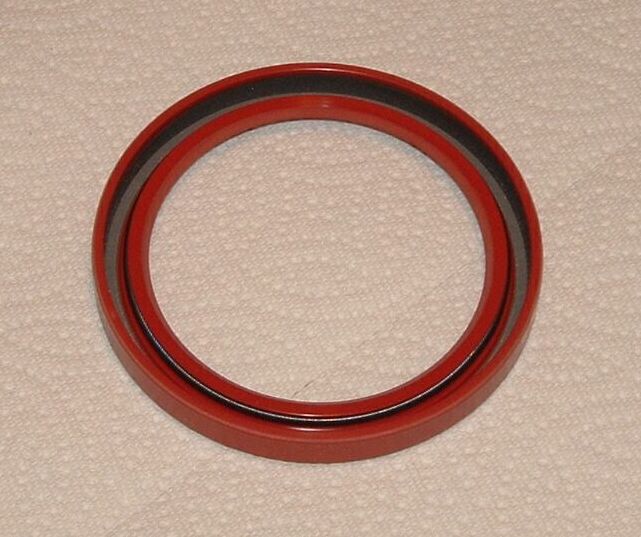
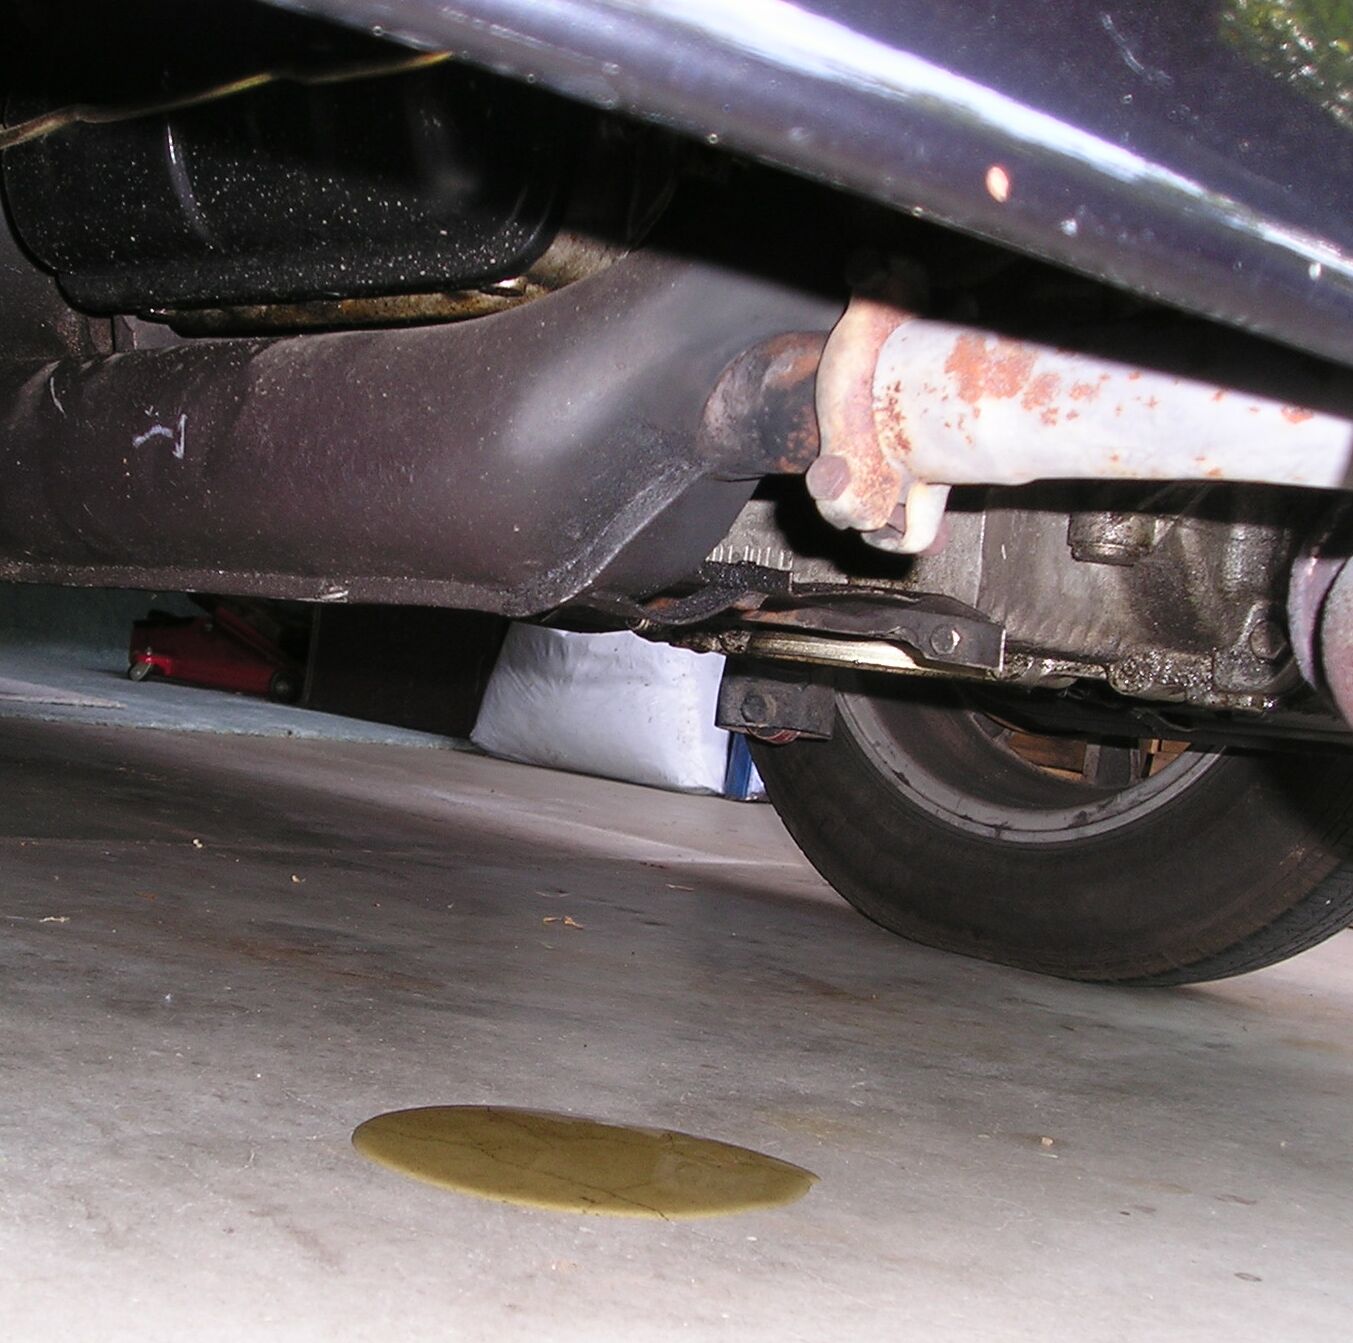
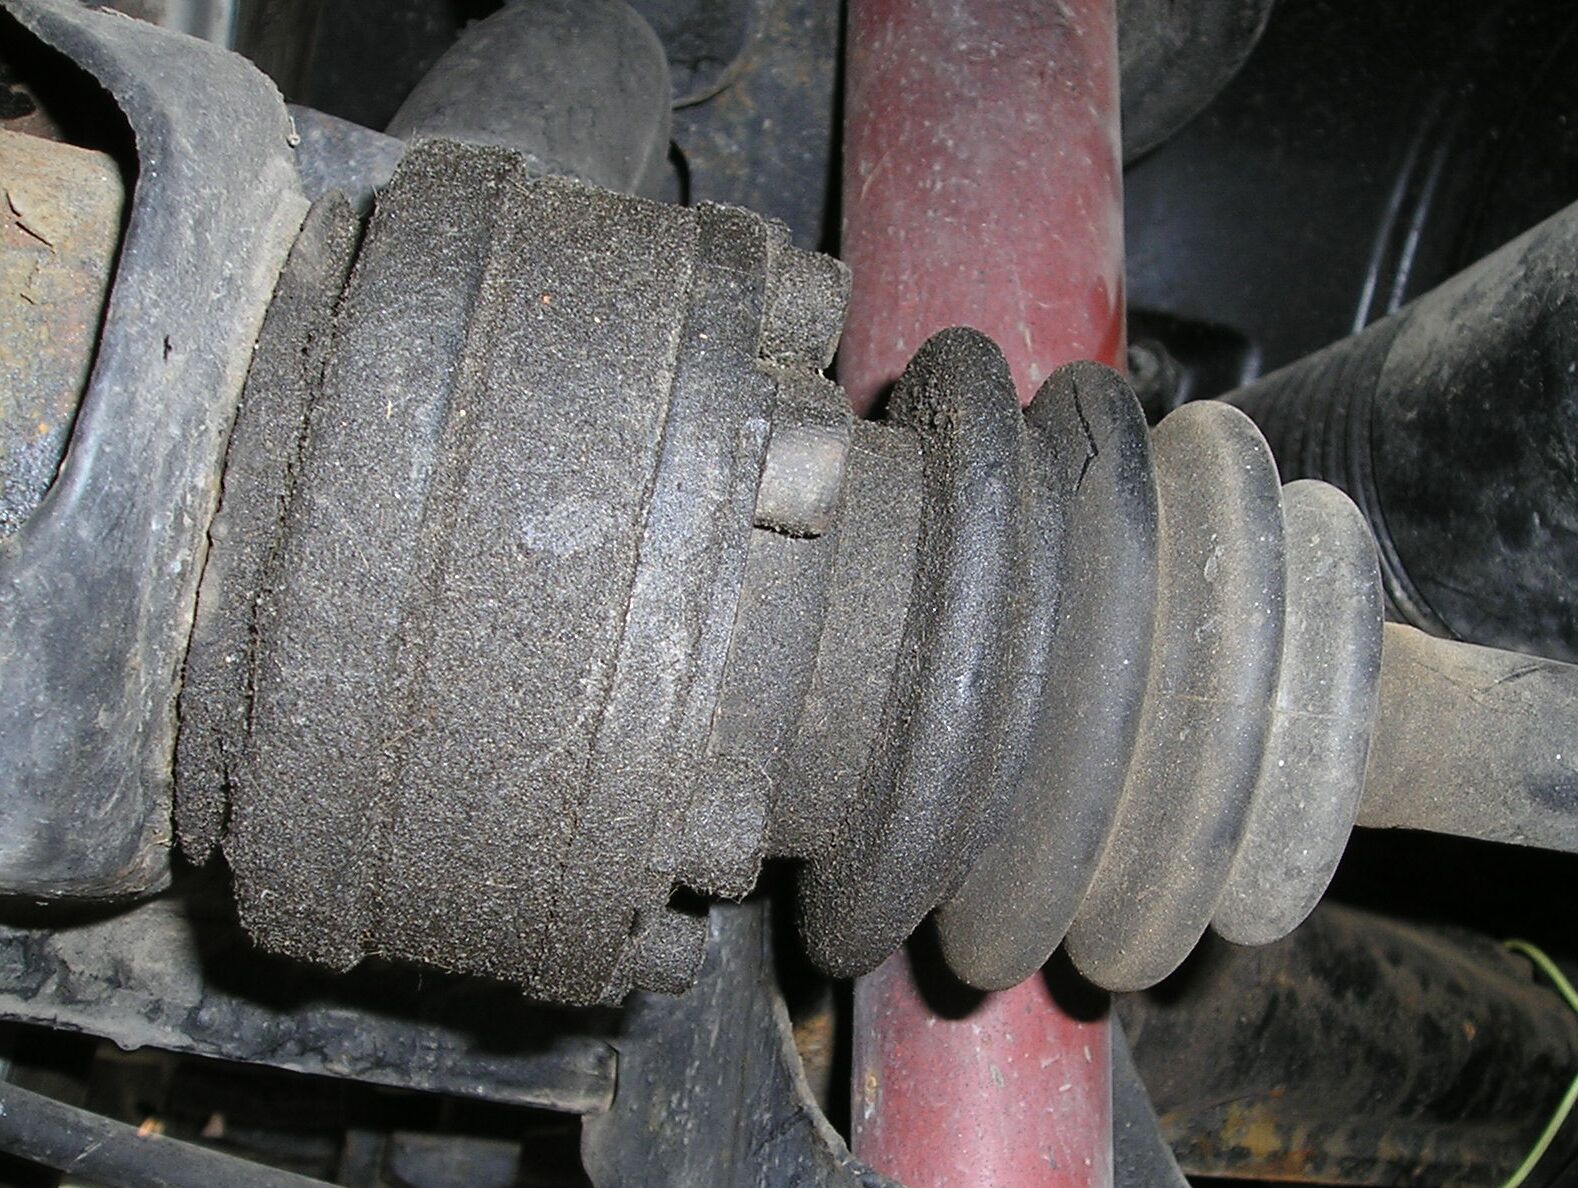 IRS CV Joint Dust Bootswing axle boot, but not difficult. Note: It IS possible to get leakage of gear oil into the inner CV joint and dust boot, though this is very rare. There is a plastic cap and circlip that must be removed in order to pull off the gearbox flange. If the plastic cap is damaged, gear box oil will leak into the CV joint and the dust boot. The leak will be periodic as the CV joint fills and then releases the gear oil into the dust boot. To get this plastic cap out you have to pierce it and lever it out. See our article on CV Joints for more details. 8. Leakage from the Main Oil SealIf you have a large engine oil leak (not transmission fluid), and if it appears to be coming from between the engine case and the transaxle, then you've most likely got a main seal problem. Replacement of the main seal is a difficult job -- the difficulty is getting to it, as removal of the engine and flywheel is required. See our flywheel removal procedure.
The Main Oil Sealcase was awful! (Spun bearing = huge endplay = ruined seal = new engine case!) If the leak is allowed to continue it will ruin the clutch. Thats how we discovered the problem in our Bug -- first the clutch started slipping, then we noticed a very large oil leak on the garage floor. When we finally got to the main seal we found it to be shredded due to very excessive endplay. So while you're there, be sure to check the endplay (front-to-rear movement of the crankshaft). Often excessive endplay (>0.006") (which is caused by the main bearing having spun in the engine case) will ruin the main seal (as in our experience), which in turn will saturate the clutch disk with oil and ruin it. If the situation is very bad, such that the main bearing cannot be installed in the case, replacement of the engine case will be required. See our procedure for checking the endplay. 9. Crankcase Ventilation Blow-byWhat is supposed to happen is that the crankcase pulls in a small amount of fresh air through the slots behind (actually, in front of) the crank pulley (front is front, remember). The annular orifice around the pulley hub is the normal intake for the crankcase ventilation system. There is a spiral groove on the crankshaft which 'pumps' air in. This is deliberate, to create a positive pressure in the crankcase, which forces any burned gases (leaking past the rings) up through the breather and through the carburetor. This way the oil gets less contamination from the cylinder gases, and any excess foaming of oil etc. can be burned, rather than dumped on the road. This is positive crankcase ventilation. The outlet from the system is through the alternator/generator pedestal and from there to a low pressure area inside the air cleaner. But when you lift your foot -- close the throttle -- there's no low pressure to maintain air flow through the crankcase. If you've got a blow-by problem (combustion gases getting past worn rings and valve guides), the pressure inside the crankcase can be great enough to defeat the oil slinger, blowing a gust of oily vapor out the inlet where the pulley does a nice job of distributing it around the engine compartment. It is essential that you have the tube from the oil filler connected to the air cleaner. Any blow-back through the orifice behind the pulley hub, including blow by from the cylinders, is pulled into the air cleaner and re-burned.
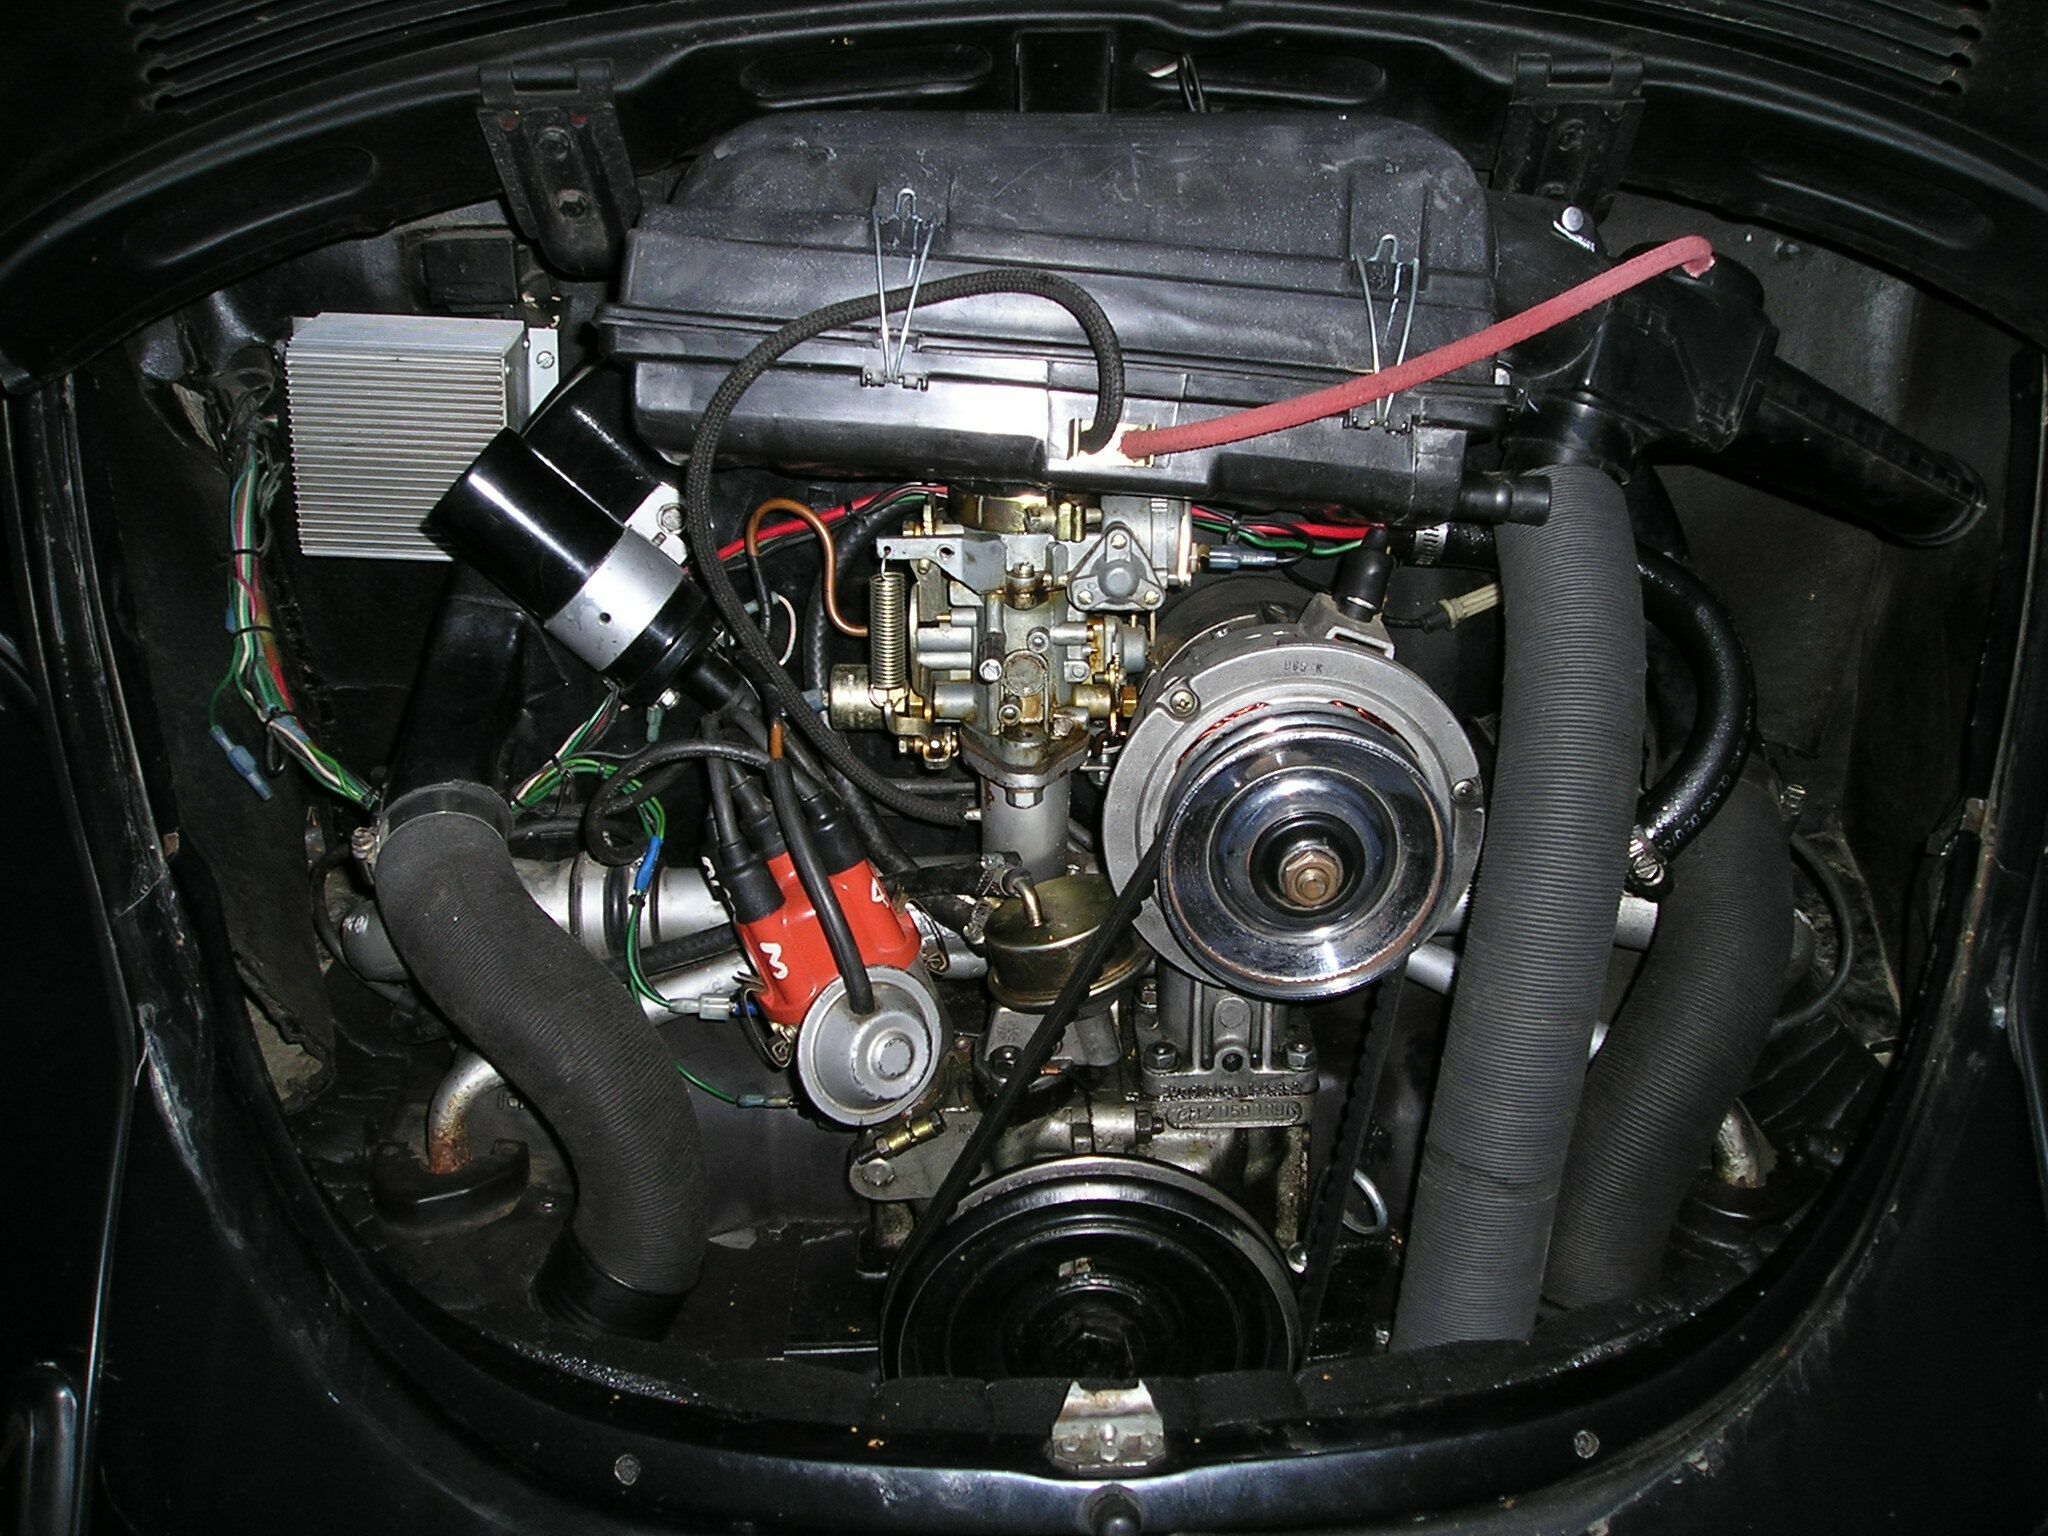 The Stock 1973 Air Cleanerthe importance of the vacuum in the air cleaner. Properly installed, the aircleaner will help keep engine oil off of the tin. If you're not using the standard air cleaner, you may not be getting enough vacuum to suck the oil laden fumes up through the alternator stand, resulting in the mist blowing out backwards through the ventilation slots behind the crankshaft pulley. Take a look -- any evidence of the oil (streaking etc) inside the cleaner would indicate that it's pulling the oily air through properly. Using an aftermarket air cleaner may reverse the pressure, causing oil to come out of the crankcase where air is supposed to be going in. If it's not a positive pressure, then there might be LESS vacuum in the air filter, resulting in a greater likelihood of more pressure inside the crankcase. The following test has been suggested - Clean everything up real well to spot the source. Try this: At idle, remove the oil filler cap and hold it loosely over the opening. It should just flutter without really being blown away. If blown away, there is excessive blow-by. We found that reverting to the stock aircleaner, with vacuum lines attaches, solved our problem with oil on the engine tin. Miscellaneous Sources of Oil LeakageA few other sources of oil leakage are possible -
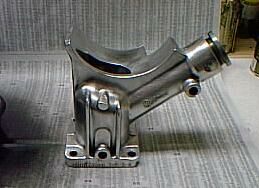
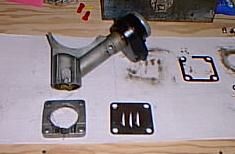 Broken Alternator Pedestal
New VW Alternator Pedestalall shined up and ready for installation. On the right, the same pedestal after a couple of years of use. With all of that done, your Bug should be marking its territory no more!
|
||||||||
|
|