Dave wrote - First thing away from the curb it ground badly going into second gear -- in fact I couldn't even get it into second.
My synchros are worn on 2 and 3, and a fast shift will produce a graunch. As a simple test -- try double clutching -- that means shifting to neutral, taking your foot off the clutch the straight back on and change to the next gear. When downshifting (3 to 2 for example), rev (blip) the engine a little whilst in the neutral with clutch out, then into the new gear. If this process gives a smoother change with less grinding, the synchros may well be worn. The process described above "matches" (manually synchronises) the input and output shaft revs in the gearbox, so a worn synchro will not have to work as hard to do it for you. So if the synchros need help to produce a smooth change -- they are worn.
It's a Big Deal to repair -- the gearbox has to come out for this job -- best undertaken with a full gearbox rebuild, since other parts (bearings etc) are sure to be a little worn too. Serious VW gearbox work needs special tools too -- best left to the experts.
Dave - I replaced the shifter bushing, hoping that would tighten the shifter up a bit, but it didnt. It stopped the horrible rattle, but there is still way too much play in the shifter. A change in the transmission fluid didn't make any difference in the sloppy shifter. This says to me that our transmission needs work.
Rob - VW transaxles are TOUGH though, so if it's going okay (albeit still a bit sloppy on the gear change) it should last a while yet. The main problem to watch for is the problem I have -- crunchy gear changes, meaning worn synchro rings, and jumping out of 4th, which means a badly worn selector fork. The gears and bearings seem to last very well so long and the oil gets changed once in a blue moon.
Dave - We havent had any of the problems you describe. I haven't noticed the grinding problem my son talked about, just the loosey goosey shifter. But I didn't have any trouble finding all of the gears without any grinding.
Rob - I can only guess he's 'forcing' the gear changes with fast shifts, and with a loose-ish shift linkage, it might be out-foxing the synchromesh for a slight graunch. I've always found that with the VWs low compression and fairly heavy flywheel, it takes a second or two for the revs to drop as you take your foot off the throttle, so rushing a gear change forces the gears to mesh when the engine is still revving higher than the new gear. This refers to changing up-- 2 to 3, 3 to 4 etc. Changing down I always ease the revs up (even double clutching if I have to force it in a hurry) to try and match the engine revs to the new gear. Of course all that should not really be necessary, but our gearboxes ARE getting old, and mine's never been out of the car, so the synchromesh is getting worn-- easy to crunch gears.
Dave - I took out the back seat and had a look at the shift rod connection to the transmission shaft by way of the shift coupler. The major thing I found -- the sloppiness is in the transmission shaft itself, not a result of a defective coupler. I'm getting very discouraged with this little car.
Rob - This probably does mean some gearbox work will be needed sometime. It's a shame when you've put so much work into it and new problems keep cropping up. I guess the trouble is that Beetles can take a huge amount of abuse and still run okay (testimony to the excellent engineering in them) but they DO wear out eventually, just like anything else, and it looks like it's all happening for you at the "same" time. And the trouble is now that if you decided to get rid of it, someone else would benefit from all the effort you've put in so far. Like being between a rock and a hard place.
Dave - I found rebuilt transmissions in the RMMW catalog under "Transaxle." They want $450 plus $40 shipping. The local VW shop wants $180.95 labor if the car has independent rear suspension (IRS), and $206.80 labor if it's a swing axle. They also gave me a price of $450 for the rebuilt transmission. You know, it might almost be worth $200 for the labor ... I just called the VW dealer in a neighboring town -- they want $240 to do the work and $2000 for the transmission!
Rob - So I guess the labour cost IS around the $200 -- 3-4 hours work for the professionals sounds about right, since this would include dropping/reinstalling the engine. $2000 for a new transmission -- a Mexican one I suppose. Twice the price of a new Mexican engine in US $ -- seems a little pricey. But rebuilt should be fine. The gears themselves are apparently very tough, and so is the case (it has to be to support the weight of the engine), but the bearings and synchros and spacers and change mechanism etc all need repair/replacing, so $450 sounds about right to me.
Having the transaxle rebuilt is an option that is just as good and less expensive. Dave checked TopLine Parts, with whom he had done business before. They indicated that they dont do transmissions, but a company in their building, "Der Transaxle," does. 2910 East Miraloma Avenue, Unit C, Anaheim, CA 92806 (714) 630-7292.
Dave called "Der Transaxle" and spoke with Jim, the proprietor. Dave described to Jim (heck of a helpful guy) his problems with the transmission (sloppy shifting, can't shift into second); he says that's very typical. It is also typical to have problems shifting into reverse. When Jim rebuilds a transmission he goes completely through it and replaces all worn parts. He even corrects a design problem with reverse gear! Jim convinced Dave that the best and cheapest way to go is to package his transmission up and ship it down to Der Transaxle to be rebuilt. Jim charges $175 plus parts; the average total cost is $300-325. The transmission weight is about 90 lbs; shipping is $45.50 each way (UPS), so the total cost, including shipping, is about $416.10. You dont need to clean it, Jim said; just drain the oil and wrap it in a couple of garbage bags.
Dave - Once the engine is out, I can't imagine that the transmission is all that hard to take out and put back in. Just heavy -- I suppose I'd need to borrow or rent a transmission jack or some such.
Rob - Mechanically it's a straightforward job. I don't think you even have to remove the rear brake/bearing assemblies on yours (I do on mine -- swing axles swing off the transmission). Just have the car sitting on the jackstands (under the torsion bar tubes) and you can use your trolley jack to take the weight of the box. I don't think it's as heavy as the engine.
Dave - As I understand it, you just remove the bolts that attach the IRS to the transaxle and wire the axles up to hold them in place.
Rob - Sounds right -- meaning the outer end of the drive mechanism (brake assemblies and bearings) are not touched.
Dave - If I can find the longitudinal center of gravity is on the transmission, I can conveniently support the transaxle at that point with the jack.
Rob - It's just forward of the drain plug I think. The nose cone has less weight in it than the main part of the box, so I think the balance point would be between the drain plug and the forward end of the main box.
As he was getting into the transaxle removal project, Dave wrote - The car is way up in the air -- I just removed the engine, and the car is supported on the jackstands resting on on blocks of wood. Now I need to build my jack pedestal under the transaxle with the jack on top of it -- then disconnect the transaxle and balance it on the jack (seems precarious). Now, how do I lower it to the floor?
Rob - I'm not sure of the exact weight, but it can't be much more than 80-100 lbs (for comparison, the complete engine is about 200lbs). So it might well be possible to have two guys under the car and lower it manually to the floor. Draining the oil out first would reduce the weight by about 7-8lbs too. :-)
Dave - A picture in the Haynes manual shows using a piece of 2x4 on the trolley jack to support the transaxle. It looks like it would be possible to build pedestals on either side for the 2x4 to rest on, then balance the transaxle on the 2x4 and gradually lower it to the floor by removing a piece of wood from each side, one at a time, just like we did for the engine. I think a little wooden cradle might be in order to hold the transaxle securely.
Rob - Personally I'd not bother with a cradle -- I'd probably just have the jack slightly BEHIND the balance point -- say under the drain plug, and pull the transaxle backwards on the jack and have something to stop the nosecone falling downwards (cross beam on bricks just in front of the jack?), and then let the jack down so the back of the box is low enough to get a hand on to the top of the bell housing whilst standing in the engine bay (take the engine lid off so you have head room), then kick the jack out backwards and lower the back of the box to the floor -- you'd only be "lifting" about 60lb of the transaxle weight this way the nose cone is still supporting the front end. Easy then to lower the front (lighter) end to the floor.
I'm assuming only one person to do the job. If you can get a friend -- the job would be a cinch.
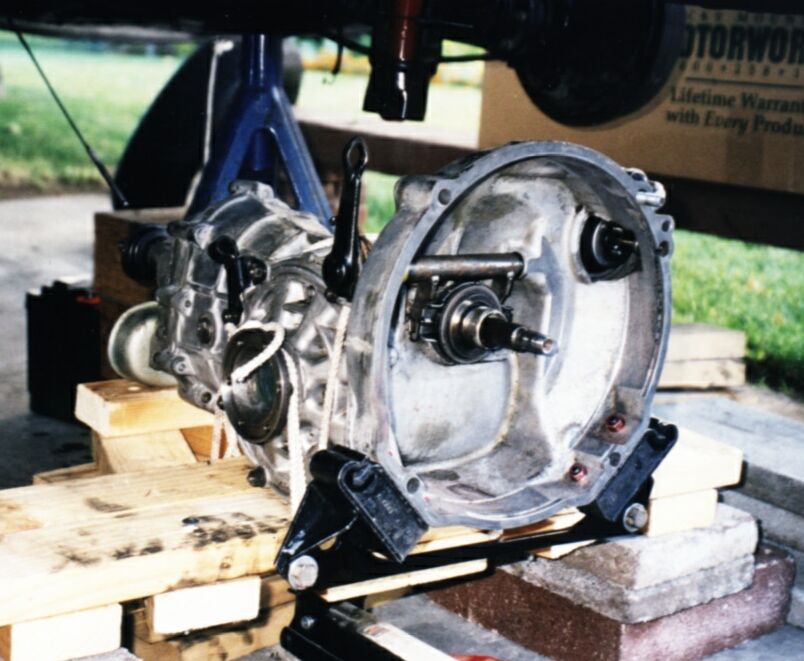
Dave did construct a triangular cradle (see the following picture); even with that lowering the transaxle was precarious. The best way to do this job is with two people. Dave discovered that the longitudinal center of gravity is NOT under the drain plug -- it's further forward. He learned this the hard way when he dropped the front of the transaxle -- only about six inches, and onto his wooden pedestal, so no harm done. Dave decided that When he reinstalls the transaxle he I will carefully determine the best jacking point and note it in the procedure.
(See the picture below for a good shot of the cradle.)
~~~
Shipment for Repair
Dave called UPS to see just how they would want a 90-lb object packaged -- they said to ship the transmission in a heavy cardboard box, 2-4 inches of foam insulation all around. Address outside and inside; and seams thoroughly taped. Ground shipping = $45.55 from Richland to Anaheim.
A friend at Western Sintering found a very sturdy barrel to package Dave's transaxle in and shipped it to "Der Transaxle" in Anaheim, California for Dave. A great service, for which we are most grateful!
~~~
Transmission Mounts
VW Transaxle Tech Tips from an old Rocky Mountain Motor Works catalog (now Mid-America Motor Works).
Anytime the engine is out of the vehicle or youre replacing the transaxle, its a good idea to inspect the front and back rubber transaxle mounts for damage and replace if necessary. Replacing the mounts is not costly and it may save you from transaxle and/or shift rod damage.
To install new rubber mounts, support the transaxle with a floor jack and remove the 13mm nuts and bolts from both sides of the rear mounts. Next remove the two 27mm bolts from the transaxle carrier. Remove the two front mount attaching nuts that hold the transaxle to the frame cross tube. Slide the transaxle toward the rear of the car until the mount clears the studs. Then remove the two nuts that hold the rubber mount to the transaxle. Install the new front rubber mount first to the transaxle and tighten the two retaining nuts. Slide the transaxle toward the front of the vehicle until it mates with the mounting studs. Reinstall the nuts and tighten. Install the new rear rubber mounts on the transaxle, and replace the washers and nuts. Do not install the rubber mounts to the carrier first. The angle of the mount bolts will not line up with the transaxle. Install the transaxle carrier, and tighten the 21mm bolts (if a torque wrench is available, tighten bolts to 167 ft-lbs). When the transaxle carrier is in place, remove the floor jack and tighten all the rear mounting bolts.
Front Mounts -
Dave initially didn't see anything that looks like a transmission mount at the front end -- just two slots in the front end of the transaxle that the two vertical bolts slide into. Dave thought that the front mount was missing, but this is it. Rob also thought that the front of the transaxle sat on a rubber block mount at the nose, so the gearbox could rotate a little in response to engine torque. Without any rubber mount there it would transmit a LOT of engine noise into the cabin, Rob wrote. This may have been the case with older transmissions -- the newer models (e.g., 1973) have no rubber in the front transmission mount.
Rear Mounts -
Dave - The two mounts on the rear are very obvious and come off with the rear cross piece once the two large (21mm)transaxle carrier bolts are removed (I used a 13/16" socket (20.6mm) and it worked just fine).

Old and New Transmission Mounts
Note how the old mount is completely broken in two!
The one on the other side is broken as well.
~~~
Rob - I think you'll have a nice quiet car after you get the missing and damaged mounts replaced. They are a mess aren't they?
Dave got a new/used rear transmission bracket from TopLine Parts to replace his bent-up one, which he sanded and painted to make it look just like new! He also painted the clutch release lever, as it was lightly rusted. ("Keen," Rob would say :-)
Rob - My VW project for the weekend is to replace the gearbox rubber mounts ...
Dave - I did it with the transaxle out, of course, so it was very easy. I don't know what it would be like with the transaxle in place. The engine must be out, of course, to provide access to the four bolts on the inside of the transaxle bell.
~~~
Grounding Strap
Dave - I also made another interesting discovery that isn't (wasn't) in the procedure -- the transaxle-to-chassis grounding strap was broken!
Rob - Since the gearbox sits on rubber mounts, and the engine hangs off that, the ground strap is the only electrical contact for the engine wiring, starter and such. It could well have been partly corroded and broken when the box was removed. Must have had some connection though, or the car would not have run.
Dave - You recall that there was no rubber cushion/insulation in the front transmission mount -- the nose cone was bolted to bare metal. That would have provided grounding, too, I think.
Rob - You're absolutely right -- that WOULD have given some grounding. And I was also thinking about the lack of a mount there for another reason -- it would probably result in the engine/gearbox sitting at a slight angle, which may have caused you some of the problems with fitting the rear engine tinware/rubber seal.
Dave - The broken end of the grounding strap (transaxle end) was shiny, like it had just been broken. By the time I noticed it the transaxle was packaged up and gone. I don't even know where it attaches.
Rob - I've been under my car and seen it of course, but don't remember EXACTLY where is joins the body, but I seem to remember it IS the body it attaches too, near where the battery sits inside the car --it MAY even be on the same bolt as the battery grounding strap.
Dave - The grounding strap is still attached to the body -- it's attached to a bolt (stud, probably) on the top of the left transaxle support member (whaddya call it!?). It's where it attaches to the transaxle that I'm not clear on.
Rob - The length will determine where it attaches to the transaxle.
~~~
Transaxle Rubber
Dave - The transmission rubber just rests on the top of the firewall tin, right?
Rob - Yes - it should do just that. That rubber is fairly wide and flexible, to maintain a reasonable seal when the engine torques (twists) a little under load and overrun.
~~~
 ~~~
~~~
Transaxle Back from the Shop
~~~
Transaxle Reinstallation
Dave - My biggest concern with the tranaxle job is re-installing it... I'm starting to lean a little toward doing it myself -- Ive dropped the engine once, I can do it again. I know zilch about transmissions, so I've got a lot of boning up and contemplating to do.
Rob - It's not a very difficult job. Briefly...
- Remove engine
- Disconnect gearshift linkage in the tunnel at rear.
- Disconnect wheel axle assemblies (I'm not sure but on yours I think you can leave the wheels in place but remove driveshafts).
- Remove three mounting bolts -- two at rear and one on the nose cone) and pull it out.
I've not covered stuff like back-up light wires, etc. here -- just the essentials.
The main thing is to get exactly the right replacement box -- there are several different nosecones and I don't know what the difference is. I suspect 73 was one of the "change" years. The nose cone rubber mount changed at some time around then too -- it's mentioned in the Changes Through the Years article I think. No biggie -- just got to match up all the parts. Replace all the rubber mounts of course -- they do compress slowly with age.
Dave - A couple of quick questions about reinstallation of the transaxle. Regarding the front transaxle mounting nuts -- the procedure says only 14 ft-lbs. Is that right?
Rob - I don't have my manual with me, but I wouldn't be surprised if it IS just that low figure -- it doesn't have to hold two metal parts together, just fix the rubber block mount. The rubber means it doesn't need to be "locked" like a metal-to-metal bolt needs to do.
Dave - The procedure says, both for disconnecting and reconnecting the shift lever to the transmission shaft, that the shift lever should be in either first or third gear. I assume this is so the shaft will be far enough forward to provide access to install the coupling.
Rob - Rearward actually. Pushing the gear stick forward into 1/3 pushes the shift rod backwards, so the coupling is under the cover plate, rather than forward inside the tunnel.
Dave - Will the guy who rebuilds the transmission put it in first or third gear, and if not, how do it get the shaft far enough forward to get the coupling on it (it's fiddly at best)?
Rob - I have no idea whether they will think to put it in 1/3 for you, but it should be possible to get some multigrips (vice grips) on the gearbox change shaft and (when looking at it from under-the-seat direction), push the shaft back into the gearbox so it is in either 1 or 3. Might need to rock the shaft sideways to simulate the gearstick sideways movement to get it to click in hence the multigrips. It will probably be a little stiff too, since it will have lots of nice new parts!
Dave - In my experience it would help to have the shift rod a little further forward (in neutral?).
Rob - Interesting. I guess just get it where it works best.
Dave - I installed the starter motor earlier this evening, but it threw the transaxle out of balance (side-to-side) so I took it back off again. I'm going to have enough trouble doing this job alone without having the transaxle flopping around too much as I'm raising it. I'm not too concerned, actually --it's pretty straightforward, especially given lessons learned (e.g., about center of gravity) when removing the transaxle.
Dave - Getting the coupler attached is VERY fiddly! The slop in the transmission made it easier, as I was able to turn the transmission shaft enough to get the tube and self-tapping screw through it. I'm worried about attaching the coupling with the new tight transmission.
Rob - I hope it's not too difficult then. VW engineering seems to be quite good though, I've always been impressed that there is ALWAYS a way to get at something on a VW, and very few sharp corners to skin your fingers in the process.
About the transaxle reinstallation, Dave reported - Pretty straightforward -- minimal frustrations. And about the front transaxle mount -- the fitting on the front with the two slots in it DOES just slide onto the two studs that are poking down. The actual rubber mount is up inside the nose cone. Jim/Jon replaced all of that for me. Jim shipped the transaxle with the front transaxle housing removed, but with a new gasket and nuts with wavy washers. I sure hope I got things lined up properly in there!
Dave - Before the day was out I had the transmission and the engine back in and the engine running (sure a lot packed into THAT little sentence!) I actually find the transaxle harder to install, even though its lighter. It doesn't balance well on the jack. My wife's words when she got home -- "You're absolutely amazing!" Nice to have words like that from your sometimes skeptical wife!
Dave reported a problem with one of his transaxle mounting bolts -- One of the transaxle mounting bolts, the big ones with 167 ft-lbs of torque, isn't screwed in all the way and looks like it's cocked a little sidewise, like it might be cross-threaded or something. So I built up my wooden pedestal under the transmission mount, then put just the slightest amount of upward pressure on the left front of the transaxle with the jack to take off any tension on the bolt. My new 21mm 6-point socket tightened it right up. To bring it up to the torque spec I put the cheater on my swing handle gave it just a bit more on the end of four feet, which I'm sure put it over the 167 ft-lb spec. What a relief! I lost a bit of sleep over that one! I'm going to double check every bolt and nut during this reinstall, I'll tell you!
~~~
"Hockey Stick" Woes
Dave - The engine is in!! Just needed to rotate the crankshaft a little and it went right in. BUT -- I have a problem -- the transmission is stuck in neutral. When I let out the clutch the rear wheels turn merrily forward, but the shifter will not move (except sideways) for love nor money! I'm afraid I may have to remove the front mount and the nose cone (if that is possible) to reposition the "hocky stick."
Rob - First time I've seen this kind of front mount -- I presume it's inside the "can". It looks as though it's possible to get the nosecone off without removing the transaxle, if the engine was jacked up a little to point the nose down as much as possible. Not sure, but it seems to have just about enough clearance there. You couldn't jack the engine much -- it would be trying to bend the rear mounts -- but at least it would take the weight off the front mount and might give you a few mm extra space to move the nosecone forward off the studs. From the look of the front mount, you can remove it completely easily enough without removing the gearbox and there is then a few inches between the box and the torsion tubes to pull the nosecone off. Don't forget to drain the transmission oil first!
Dave - I called Jim at Der Transaxle -- he says the "hockey stick" must be in the wrong position, and I'm going to have to drop the engine again and pull the transaxle back to fix it! He said its really not possible to remove the nose cone with the engine in the car. He's going to fax me some kind of a picture showing what the inside of the nose cone should look like -- I obviously screwed it up when I assembled it. He says that once I get the engine started and then slowly let out the clutch things MAY pop into place, but what if they don't? I'm really torn. A friend recommends lowering the car and pushing the car with the transmission in gear (which it is -- lock in a forward gear) to break it loose rather than starting the engine and then releasing the clutch. If I do the former and it doesn't work, then I'll need to raise the car again to work on the transaxle.
Rob - I'm going to stick my neck out here and suggest you take the transaxle out and remove the nose cone. I have been thinking about this, and since I don't know exactly what the problem is I'd be inclined to have a look inside, rather than trying to "break it loose" as I'd be afraid of "breaking it in pieces", which would make the repair job even worse. I know you don't want to hear that but I think you're reluctantly leaning that way anyway -- yes?
Dave - On the bright side, I'm well practiced!
Dave - A picture in Section 3 of the Bentley Manual shows the innards of the transmission pretty clearly (though a somewhat different model), and I can see where I went wrong with the "hockey stick." I just hope my situation is similar enough to the picture that I get it right. I should have looked more closely at the pictures in the book -- but that's 20/20 hindsight.
I'm a bit torn -- I would like to be able to lower the engine and leave it right there on the final blocks under the car, then turn around and go after the transaxle from the front -- remove the two nuts on the front and the two hurky bolts in the cradle on the back, then move the transaxle back just far enough to get the clearance to remove the front mount and the nosecone.
Rob - Sounds like you'll need to support the gearbox from underneath -- I take it that this method would leave it "hanging" on the drive shafts. I guess it will come down to "Is there enough room for Dave under there with all the other stuff to support the engine and gearbox?"
Dave - Would it be better just to lower the engine onto the creeper and pull it out, then pull the transaxle completely out of the car to work on it?
Rob - Why not try it with the box still "in" the car, but expecting to have to take it out. Then you won't be too upset if you have to remove it, and happy if you don't.
Dave - What I need is an end-on view of the assembly with the nose cone off, showing EXACTLY where the "hockey stick" is supposed to go. I need to study this a bit more and take a close look at the actual situation. Its still not awfully clear to me.
Rob - I'm guessing that when you get it apart, the three slots to line up will be obvious, then it should be easy enough to make sure the hockey stick is in the slots as you put it back together.
If you find the hockey stick is jammed with the slots off line then trying to jump it into gear by rolling the car or whatever could well have caused damage. I understand more now how it works myself (not exactly, but near enough to feel confident about taking mine apart), and suspect that serious damage could be caused by that method suggested to "fix" it.
I bet if you take a look at it and imagine the gearstick push-pulling and rotating a little (1st/3rd for example) you'll find the end of the hockey stick will slide along the slots with the sideways movement of the gearstick, and the appropriate slotted rod will be moved in/out (or perhaps up/down) with the fore/aft movement of the gearstick. Imagine the slotted rods (I'm calling them rods but I can't see exactly what they look like) as A,B,C. B-in for 1st, B-out for 2nd, move the gearstick sideways (sliding the hockey stick sideways) to grab the C-slot, C-in for 3rd, then C-out for 4th, and move the stick the other way through the gate past 1st/2nd, and get A-out for reverse (no A-in as the gearstick doesn't move into that position). The in/out might be up/down, but you get the idea.
1st 3rd
A B C
Rev 2nd 4th
So if I am right, in 1st it would be -
B
A C
And 4th would be -
A B
C
and Neutral -
A B C
Or something like that.
I'm just guessing, but I bet you find the centre slotted rod up or down (or in/out), and the hockey stick stuck between the top of the center rod, and the bottom of the other two. This would jam it in 1st if my imagined operations are correct.
Dave - I've about reconciled myself to pulling the transaxle completely out.
Rob - I wasn't going to suggest it myself -- you're on the spot to see if it was possible to do the other way, but at least then you won't be struggling to work over your head.
Just a thought -- you may not have to drain the transmission oil -- if you can tilt it enough to get the nose cone above the oil without tilting so much it leaks out the main input shaft seal at the rear end, it might save you a little time if that works.
Dave wrote regarding the selector rods - The middle selector rod was pushed in, and the "hockey stick" was stuck over the top of it and in between the other two.
Rob - Sort of how I imagined then, I'm glad I wasn't too far out. If I am seeing the "nose cone" pic correctly, the outer two selectors cup the hockey stick, preventing it sliding too far they act as their own 'end stops', where the centre selector allows the hockey stick to slide either way freely. A little different to my imagined layout, so I was interested to see it.
How's the gear change now -- nice an crisp? (despite the sloppy coupler?)
~~~
Semi-Auto Problems
Someone wrote to ask - I'm trying to get some advice on fixing my 1972 semi-automatic VW Beetle which is BANGing into gear. :-(
Rob - I'm not an expert on the VW semi-auto, but might be able to provide a few pointers for you. There are four areas I can think of which might result in it banging into gear -
- Driving style.
- Clutch (yes - it does have a clutch).
- Torque converter.
- Engine tuning.
- Electrical.
First a little info on the VW semi-auto. It uses the same gearbox as the manual car, but without 1st gear. L is the same as the manual's 2nd gear, D1 is the same as 3rd, and D2 is the same as 4th. It has a mechanical clutch which is operated by a switch under the gear stick, this activates a vacuum device to pull the clutch in/out. And it has a torque converter which provides the "slip" which you would otherwise get by slipping the clutch as you change gears in a manual car. Because the torque converter supplies the slip, the clutch is almost (but not quite) instant - it's either in or out with only a tiny amount of slip in itself.
- Driving style. The correct method of changing gears is a) -- remove your foot from the throttle, b) - move the gear stick to the next position, c) - use the throttle again. If you keep your foot on the throttle when changing gears the engine will be under load when you make the change so when the clutch re-engages it will "thump" the torque converter rather than letting the torque converter do it's thing properly.
- Clutch. As I said, it works almost (but not quite) instantly. It's a small clutch, the same size as used in the 1200 beetles. It doesn't need to be a larger one as it doesn't work nearly as hard as the manual clutch does. So it's slow to wear out, but it WILL wear out eventually, and this might be your problem - the clutch may be snatching rather than gripping the flywheel smoothly. It operates via a vacuum system from a pipe under the carburettor. This leads (if I remember right) to a canister on the right side of the engine bay. This canister acts as an air reservoir so you can make several gear changes quickly without running out of vacuum. There is an electrical valve somewhere in that part of the system too, which is activated by a switch under the gear stick (you CAN'T drive an Auto VW with your hand resting on the gear stick as that will disengage the clutch). Under the car, on top of the gearbox on the left side, is another vacuum canister with a pull-rod to the clutch. This moves the clutch itself. There is a vacuum line from the engine bay to this canister. All those vacuum lines and canisters must be in good order for the system to work smoothly.
- Torque converter. There is a fluid container on the right side of the engine bay. This has a level stick under the cap. Check that the fluid level is up to the mark. Low fluid in torque converters can make them snatch. Use Dexron 11 ATF fluid. Don't use DEXRON 111 it MIGHT be OK, but some of the newer fluids contain ingredients which don't work well with components in older systems. On this topic, the gearbox itself uses Hypoid gear oil, same as the manual gearbox. 80w90 or 85w90 Hypoid is fine, but it MUST be GL4 and not GL5 standard. GL5 will corrode the bronze synchromesh rings inside the transmission.
- Engine tuning. The VW semi-auto should idle at 900rpm. If it's idling faster it will clunk into gear when starting from rest, and might do so at higher speeds too. If the engine cannot be tuned to idle at 900, look for air leaks around the carburettor (particularly around the throttle shaft which tends to wear oval after some years). You can test for air leaks by spraying diesel starter fluid (ether) or WD40 around the shaft, and the carby-manifold join, and the vacuum line joiners etc, whilst the engine is idling. If the engine note increases momentarily, you definitely have an air leak. If you have an air leak, you'll NEVER get the engine to idle right, and your gear changes will probably be clunky as a result.
- Electrical. I'm guessing the gear stick switch and the electro/vacuum valve are working OK, since you say it IS changing. Or maybe this system isn't working and it's trying to change gears with the clutch still engaged. If you have a friend who can look under the car on the left side at the vacuum canister on top of the gear box, he/she should be able to see the pull-rod moving when you put your hand on the gear lever (with the engine idling of course). If it isn't moving then the clutch is continuously engaged and either the electrical of vacuum systems are not working. Armed with that info you could talk to your mechanic if you're not confident in checking it out yourself.
~~~
Transmission Codes
AA 1200 4.375 from chassis No 0 981 810
AB 1300 4.375 Up to 8/70
AC 1500 4.125 Also some 1300 from 8/70
AD 1200 4.375 Limited Slip Differential (LSD)
AE 1300 4.375 Limited Slip Differential (LSD)
AF 1500 4.125 LSD up to 8/70; also some 1300 from 8/70
AG 1200 4.375 Type 147 (Fridolin)
AH 1500 4.125 IRS suspension from 8/68
AH 1600 4.125 8/69-8/72
AK 1500 3.875 Type 181 Trekker up to 8/70
AK 1600 3.875 Type 181 Trekker from 8/70
AL 1500 3.875 Type 181 with LSD to 8/70
AL 1600 3.875 Type 181 with LSD from 8/70
AM 1300 4.375 Saloon and Cabrio from 8/70
AN 1600 3.875 Karmann Ghia IRS from 8/70
AO 1600 3.875 Karmann Ghia from 8/70
AP 1300 4.375 LSD from 8/70
AQ 1600 4.125 LSD 8/70-8/72
AR 1600 3.875 K-Ghia LSD from 8/70
AS 1600 3.875 Type 1 from 8/72
AT 1600 3.875 1303S and Cabrio from 8/72
AU 1600 3.875 Ditto with LSD
BA 1300 4.375 Semi-auto from 8/68-8/70
BA 1500 4.375 Semi-auto from 8/68-8/70
BC 1300 4.375 Ditto with LSD
BC 1500 4.375 Ditto with LSD
BE 1600 4.125 Semi-auto from 8/70-8/71
BF 1600 4.125 Ditto with LSD
BG 1300 4.125 K-Ghia semi-auto from 8/70
BH 1300 4.125 Ditto with LSD
BJ 1300 4.375 Semi-auto from 8/70
BK 1300 4.375 Ditto with LSD
DA 1500 4.125 Type 3 swing-axle to 8/68*
DA 1600 4.125 Type 3 swing-axle to 8/68*
DB 1500 4.125 Ditto with LSD*
DB 1600 4.125 Ditto with LSD*
DC 1500 4.125 Type 3 with IRS from 8/68
DC 1600 4.125 Type 3 with IRS from 8/68
DD 1500 4.125 Ditto with LSD
DD 1600 4.125 Ditto with LSD
*
* * * *
