|
|
|
Cooling Air System Removal/Installation
~~~
Sometimes the cooling vanes will need replacing just through old age. Sometimes they have been removed by a previous owner or engine rebuilder who thinks they are not needed in the VW engine. But the cooling vanes and thermostat are an essential part of the VW cooling system. The thermostat and vanes together make for a rapid warm-up (lower engine wear); and the vanes also help guide the cooling air where it is needed most - more to the hotter heads, less to the cooler running cylinders.
~~~
Procedure for Installing the Cooling Vanes
- Remove the fan shroud from the engine in accordance with the Fan Shroud Removal Procedure.
- The connecting link and return spring were removed during the shroud removal procedure, as the shroud will not come off with the connecting link attached. Remove the right and left cooling vane assemblies by taking out the eight fillister head (cheese head) screws that hold the two assemblies in the lower part of the fan housing.
- Install the new right and left cooling vane assemblies with the eight fillister head screws. Attach the new return spring to the connecting link. The return spring is mainly an anti-rattle spring, but does also aid the opening of the vanes as the thermostat gets hot and expands.
Note: Dave found it necessary to drill a new hole in the connecting link for the return spring, as the spring provided was too long.
- If you plan to inspect/replace the oil cooler seals, now is the time to do it, before the fan shroud is reinstalled (see the "Oil Cooler Removal" procedure).
- Insert the new thermostat connecting rod into place in the right-hand cooling vane assembly and secure it with a new clip.
- Reinstall the fan shroud (see "Fan Shroud Replacement" procedure), being very careful to make sure that the thermostat connecting rod makes its way down between the cylinders without binding as it passes through the slot in the air control plate (a flat metal plate between the cylinders (one on each side of the engine) which forces the cooling air through the finning on the cylinders rather than "spilling" between the cylinders - this is another essential component in the VW cooling system - make sure they are both there!)
- Install the new connecting link onto the four attachment points on the cooling vane assemblies (two on each side). Put on a washer, then the linkage bar, then a spacer spring, another washer, and finally a circlip to hold the whole assembly together.
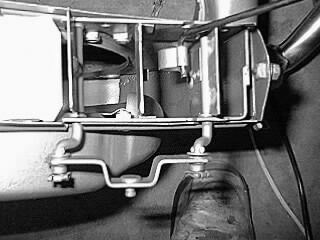 Cooling Vanes Attached to the Linkage Bar
(Looking up into the fan housing.)
Cooling Vanes Attached to the Linkage Bar
(Looking up into the fan housing.)
 Cooling Vanes Attached to the Linkage Bar
~~~
Cooling Vanes Attached to the Linkage Bar
~~~
- Install the new cooling vane return spring between the hole in the fan shroud and the hole in the connecting link.
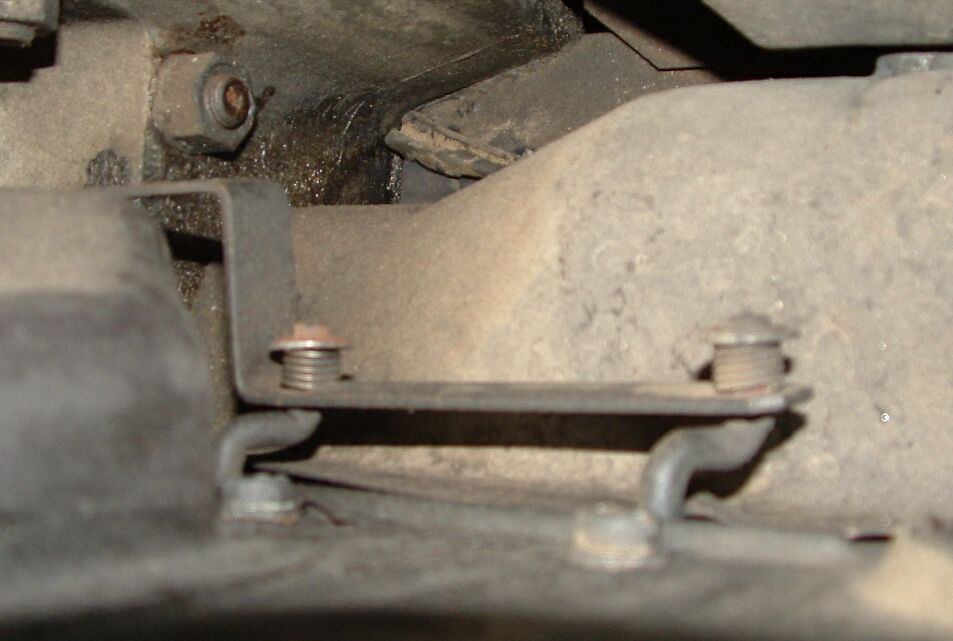
- Loosely attach the the thermostat bracket onto the stud that sticks out of the side of the crankcase on the bottom of the engine. Place the thermostat into the bracket and screw it onto the connecting rod coming down between the cylinders.
- Raise the thermostat all the way up and confirm that the control flaps are wide open. Adjust the bracket so that the top of the thermostat just contacts the upper part of the bracket. Lock the bracket in position by tightening the nut. This adjustment is important as it ensures the vanes will fully open when the engine heats up, but still fully shut as the engine cools - ensuring a quick warm-up next time the engine is started.
- Pull the thermostat (and connecting rod) down and bolt it onto the lower part of the bracket. The cooling vanes should now be shut. Note that the thermostat has two flat sides in the bolt fitting, and the hole the bolt passes through has similar flat sides. These flats must lock together to prevent the thermostat gradually winding itself loose in operation.
*
* * * *
|
|
