|
|
|
Door Latch Striker Plate Adjustment
Note: This procedure is for 1967 and later model cars.
Earlier models are similar.
~~~
Note: Before beginning, make sure the door is properly adjusted. See our Door Adjustment Procedure.
The door latch mechanism (the point at which the door latches to
the door post) consists of two parts -- the striker plate on the
door post, and the latch on the door. If your door rattles or requires
excessive force to close and lock, the door latch striker plate
is probably out of adjustment.
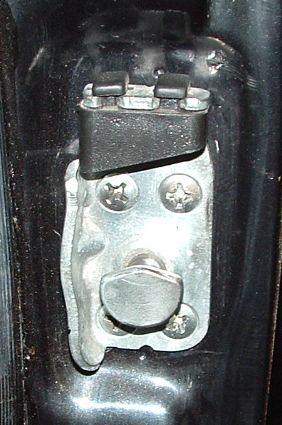
Striker Plate (on the door post)
~~~
- Completely remove the striker plate from the door post by removing
the four Phillips head screws that hold it in place.
Note: As these screws will see a lot of action as the
door opens and closes, they must be very tight. You may need an
impact wrench to remove them. (See the picture below.)
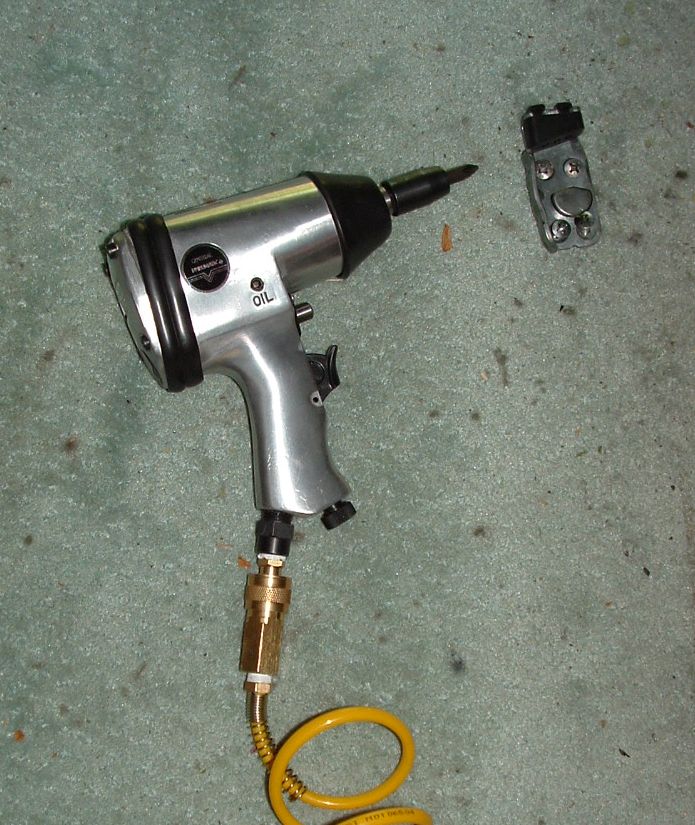
Pneumatic Impact Wrench
~~~
Note: The striker plate is attached to the door post
with four Phillips head screws that are threaded into a moveable
plate inside the rear quarter panel. Don't be alarmed when the
striker plate drops down a bit when you remove the screws -- you
haven't lost a nut down inside the door post or anything. When
making adjustments, loosen the screws so that they are snug enough
to hold the plate in position but loose enough to allow you to
move the plate. - Close the door and note whether the front edge of the door is flush with the front panel.
If it isn't, loosen the hinges and move the door in, out, up or down as necessary. (Again, see our Door Replacement/Adjustment procedure.)
Latch (on the door)
~~~
- Insert the striker plate, bottom first, in the latch on the door, the way it goes.
Press the latch down into its fully locked position, then rotate
the striker plate toward the outside of the door (counterclockwise
on the left door, clockwise on the right door). The striker plate
should now be firmly attached to the door, with the door lock
depressed.
- Return the striker plate to a vertical position on the latch.
Try to move the striker plate up and down on the latch. If the striker plate can be moved up and down, the rubber wedge on the striker plate must be shimmed or replaced.
Note: To correct either a misalignment between the door and front body or a lock of uniformity in the gap between the door and the body, adjust the door hinges and not the striker plate. Only misalignment (vertical or horizontal) between the door and rear body should be corrected by adjusting the striker plate.
- Remove the striker plate from the latch on the door by depressing the door release trigger; lay the striker plate and its screws aside for a moment.
- Correct any excessive wedge play by installing shims or replacing the wedge as necessary.
- Install the striker plate in its proper position on the door post and tighten the screws snug enough
to hold the plate in position but loose enough to allow you to
move the plate.
- Adjust the striker plate as follows -
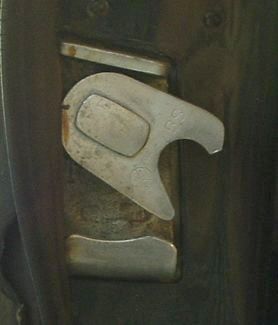
- Use the notches at the top and bottom of the
striker plate as reference points for the preliminary alignment
of the striker plate in the door frame. Match these notches in
the striker plate with the dimples in the body where the striker
plate attaches.
- Close the door. Note the alignment of the door and rear quarter
panel. If they're not flush, move the striker plate up or down.
Note: The striker plate screws onto the movable threaded plate behind the pillar panel. By moving the plate up or down, you can correct any misalignment of the ridge in the body where the door and the rear body meet. Moving the plate in or out corrects the position of the door so that it will be flush with the side of the car when the door is closed.
- After aligning the door, feel for play between the lock and the striker plate. If there is play or if the door will not latch, rotate the striker plate clockwise in an arc with the striker plate lug at the center. This moves the wedge closer to the door latch.
- If the door is difficult to close or if the handle works stiffly (i.e., the pushbutton is hard
to operate), the top of the striker plate is inclined inward too
much, which forces the wedge against the latch too tightly. Loosen
the screws, rotate the plate outward slightly, and check again.
- If the door springs back to the safety position instead of remaining
closed when you slam it, the top of the striker plate is inclined
outward too much, which prevents the wedge from applying sufficient
pressure to hole the latch in place. Loosen the screws, rotate
the plate inward slightly, and check again.
- If it's hard to open the door with the pushbutton and the door
drops noticeably when you open it, instead of holding its horizontal
position, the striker plate is too high. Lower the striker plate.
- If the door springs out of the closed position when you slam
it and engages the safety notch, the striker plate is too low.
Raise the plate.
- Once the door is flush with the lock pillar, the bottom of the door is aligned with the rear quarter panel, there's no play between the lock and the striker plate when the
door is opened or closed with the handle, and the door opens from
the inside without excessive effort, the striker plate adjustment
is correct.
- Once you have the striker plate adjusted properly, tighten the
four bolts that hold it in place as tightly as you can. Using
an impact wrench with a clockwise turn -- but
be careful not to damage the Phillips screw heads.
*
* * * *
|
|
