|
||

|
|
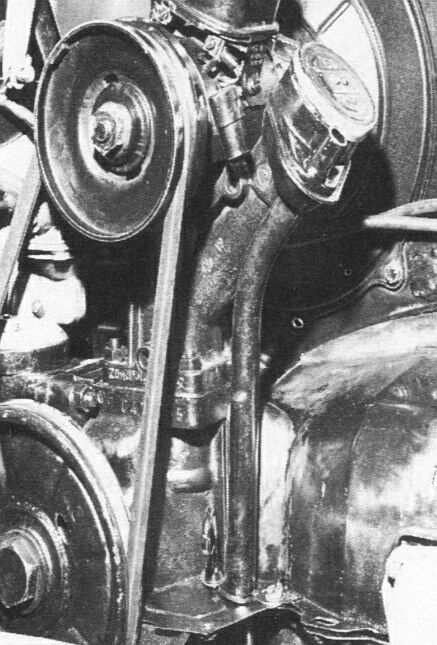
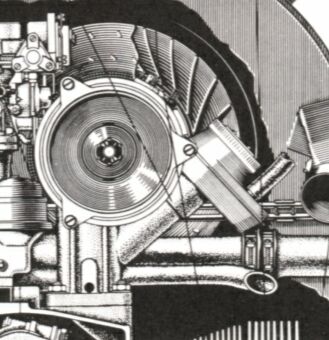
Oil FillerAs discussed in our article on the Alternator Pedestal, Dave had trouble with the alternator pedestal cracking completely in two around the base, probably due to the cheaper construction of the aftermarket pedestal. After much agonizing, Dave finally found a used original VW aluminum pedestal, which solved the cracking problem. Of course replacement of the alternator pedestal necessitated replacement of the oil filler neck. In so doing Dave was interested to find two filler neck designs -- one with a vent tube running down from the filler neck through the engine tin, and the other without such a vent tube. Sometime between 1968 abd 1971 VW changed the design of the oil filler neck. Dave found the design without the vent tube difficult to find, so he ended up reburbishing and painting the filler neck for reuse. Oil Filler Neck Designs Rob explains - The vent tube design has a tube that runs down from the filler neck, through the engine tin, to the road air beneath the engine. The metal tube has a rubber fitting on the end which is flattened so it normally sits shut (like the reed on a clarinet). This rubber fitting prevents road grime from going up into the engine while allowing excess oil/fumes or whatever to drain out onto the road. On both designs there is also a nozzle on the upper size of the oil filler. A rubber hose on this nozzle connects to the air cleaner to act as the main vent, so the engine eats it's own crankcase fumes. The idea is that the spiral groove in the crankshaft behind the engine pulley pulls in fresh air to help rid the crankcase of "blow-bye" contamination from the cylinders. This air is then drawn through the alternator pedestal and up into the air cleaner and then to the carburetor where it is re-burned. Any excess oily air is vented through the road tube. The other oil filler neck is the same except that it has no downspout/road tube vent. Lack of the road tube may cause some oiliness in the filler area -- though a loose filler and lack of an air cleaner breather from the filler is probably more to blame. Dave's oil filler neck is of this latter design, though the replacement he bought, supposedly the proper one for his 1973 engine, had the down spout and was therefore unusable. Dave ended up refurbishing and reusing his old filler neck without the down spout.
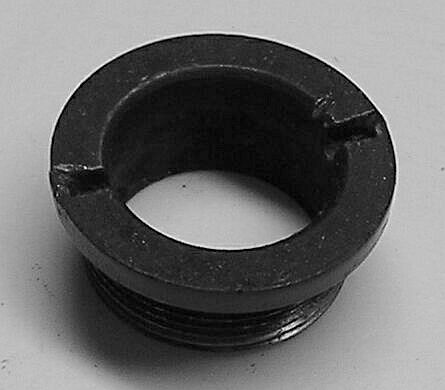
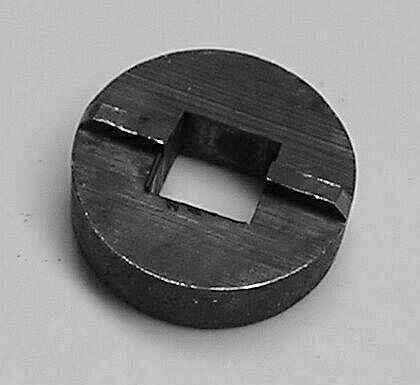
Getting the oil filler neck off of the alternator stand is a real trick. Dave had no end of trouble until he finally learned how it's put together. The filler neck is held in place by a threaded fitting (gland nut) down inside of the oil filler. This fitting has two slots in it that are used to tighten and loosen the gland nut. There is a special nut removal tool available that fits on your 1/2" extension.
Dave muttered under this breath a bit before he I got his gland nut removal tool. Without this tool it is virtually impossible to remove the oil filler. Aircooled.Net sells a budget oil filler nut removal tool for $9.00 and a deluxe model for $16.95. (Aircooled.Net says that the deluxe model is outstanding, and will remove most any frozen nut, regardless of how seized it is. The budget model is fine for "occasional" use but not recommended it for more then that.) For most VW affectionadoes the cheaper model will do, it being one of those "use-once-in-five-years-but-essential" tools. Lacking this tool, it may be possible to use a wide wood chisel as a screwdriver to get a center nut out of the oil filler. Dave didn't have much success with this method, not having a chisel that is wide enough. Removing the gland nut can sometimes be pretty tough even with the special gland nut removal tool. You have to make sure that the tool is on the gland nut squarely, with both projections firmly in the slots in the nut. If you get it cockeyed it will round off the slots. Though we haven't had the experience first hand, we've heard that some have had luck removing the gland nut with small internal pipe wrenches like these - 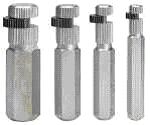 Internal Pipe WrenchesDave found that his filler neck spun around freely on the alternator stand. At first he suspected that the guy at the VW shop had neglected to put a necessary washer (or perhaps two) under the filler assembly so the gland nut could be snugged down tightly to prevent the filler neck from spinning around and around. However, when Dave put the new oil filler on the new pedestal (just to see), he found that it was loose too! Dave speculated that the hole in the tin that the vent tube passes through was designed to hold the assembly in place when the oil filler cap is removed. But Rob reported that there is absolutely no movement in his filler tube when he removes the cap -- even without the tinware in place to hold the vent tube in place, it still doesn't move, and the filler is quite tight on the stand. We're told that there is usually a paper gasket between the stand and filler housing. One person we know uses a 1500cc single port copper crush gasket that comes in a gasket kit instead. This is the gasket that usually goes between the manifold and the head. This gasket is missing in Dave's system. Dave was finally successful in removing the oil filler assembly from the new/used alternator pedestal and installing the refurbished filler assembly from the old pedestal onto the new one.
|
||||||||||
|
|