|
||

|
|
Oil Temperature Gauge InstallationThis procedure was generated as a result of that experience. including a Gene Berg Assessment. Note: The oil temperature should not exceed 235 F (113C) -- if the temperature is higher than this, the heat can cause case studs to pull out, head and case sealing surfaces to warp, cases to be internally distorted, permanent case metal fatigue and engine bearings to wear prematurely. Gauge Installation Procedure:
Note: You've probably already discovered that working up under the dash is a bit of a nightmare. You must remove the driver's side seat, but then you have the front seat support to contend with. I found a piece of heavy plywood to lay across the seat support to be very helpful. It's still a pain working under the dash, especially if you're kind of a big guy like me, and if you wear bifocals. Note: We did this by scoring the outline for the hole in the plastic, then drilling numerous holes (1/8") all around the inside of the scored marking. This is difficult with a power drill, as access is limited. We found a right-angle attachment on the drill to be very useful. With these holes drilled all around the inside perimeter of the hole, we cut between the holes with a hand-held coping saw blade. We smoothed out the edges of the hole with a round file. Note:There is a collar that screws onto the body of the gauge from the rear, tightening it into place. Make sure that all the wires run through this collar properly before making the final connections. Note: Attaching the wire to the fuse is a real pain. I already had the radio connected to this fuse to assure that it turned off when the ignition is turned off, so I had to use an adaptor with two male spade connectors. Whoever designed that situation had much smaller fingers than I have, and he sure didn't account for bifocals! Be patient. I couldn't find a good place to attach the ground wire; I finally drilled a hole in the sheet metal and installed the ground wire with a sheet metal screw at that point.
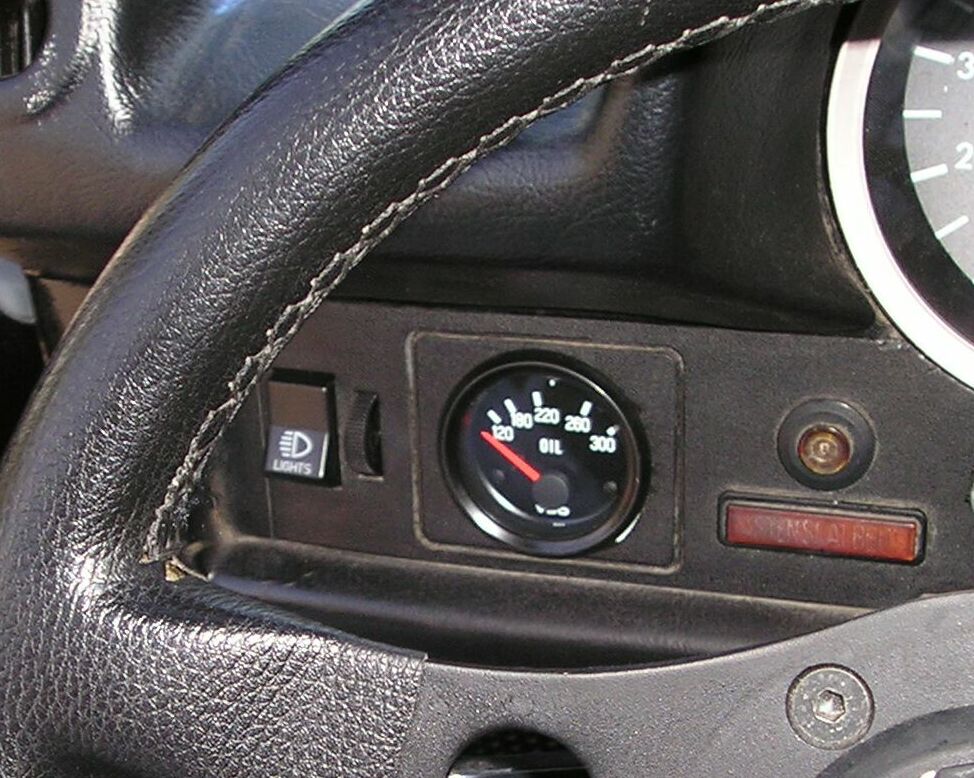 Oil Temperature Gauge InstalledNote: After an initial run on a hot day to warm the engine up, we found that the temperature on the gauge to read about 175F or so -- yet the dipstick handle was almost too hot to touch. Gene Berg may be right in his assessment of temperature gauges!
|
||
|
|